Create an Azure AD Application
Create an Azure AD Application
NOTE
The Chocolatey Intune integration shipped as part of v3.0.0 of the Chocolatey Licensed Extension.
NOTE
The Chocolatey Intune integration requires a valid Chocolatey for Business or Chocolatey for Business Trial license.
Summary
To allow Chocolatey to access the Intune tenant and work with packages, a user with the Global Administrator or Privileged Role Administrator permissions must create an Azure AD Application in your Azure tenant. See the Microsoft Graph API documentation for further information.
The steps and screenshots below are current as of July 2021.
Create Azure AD Application
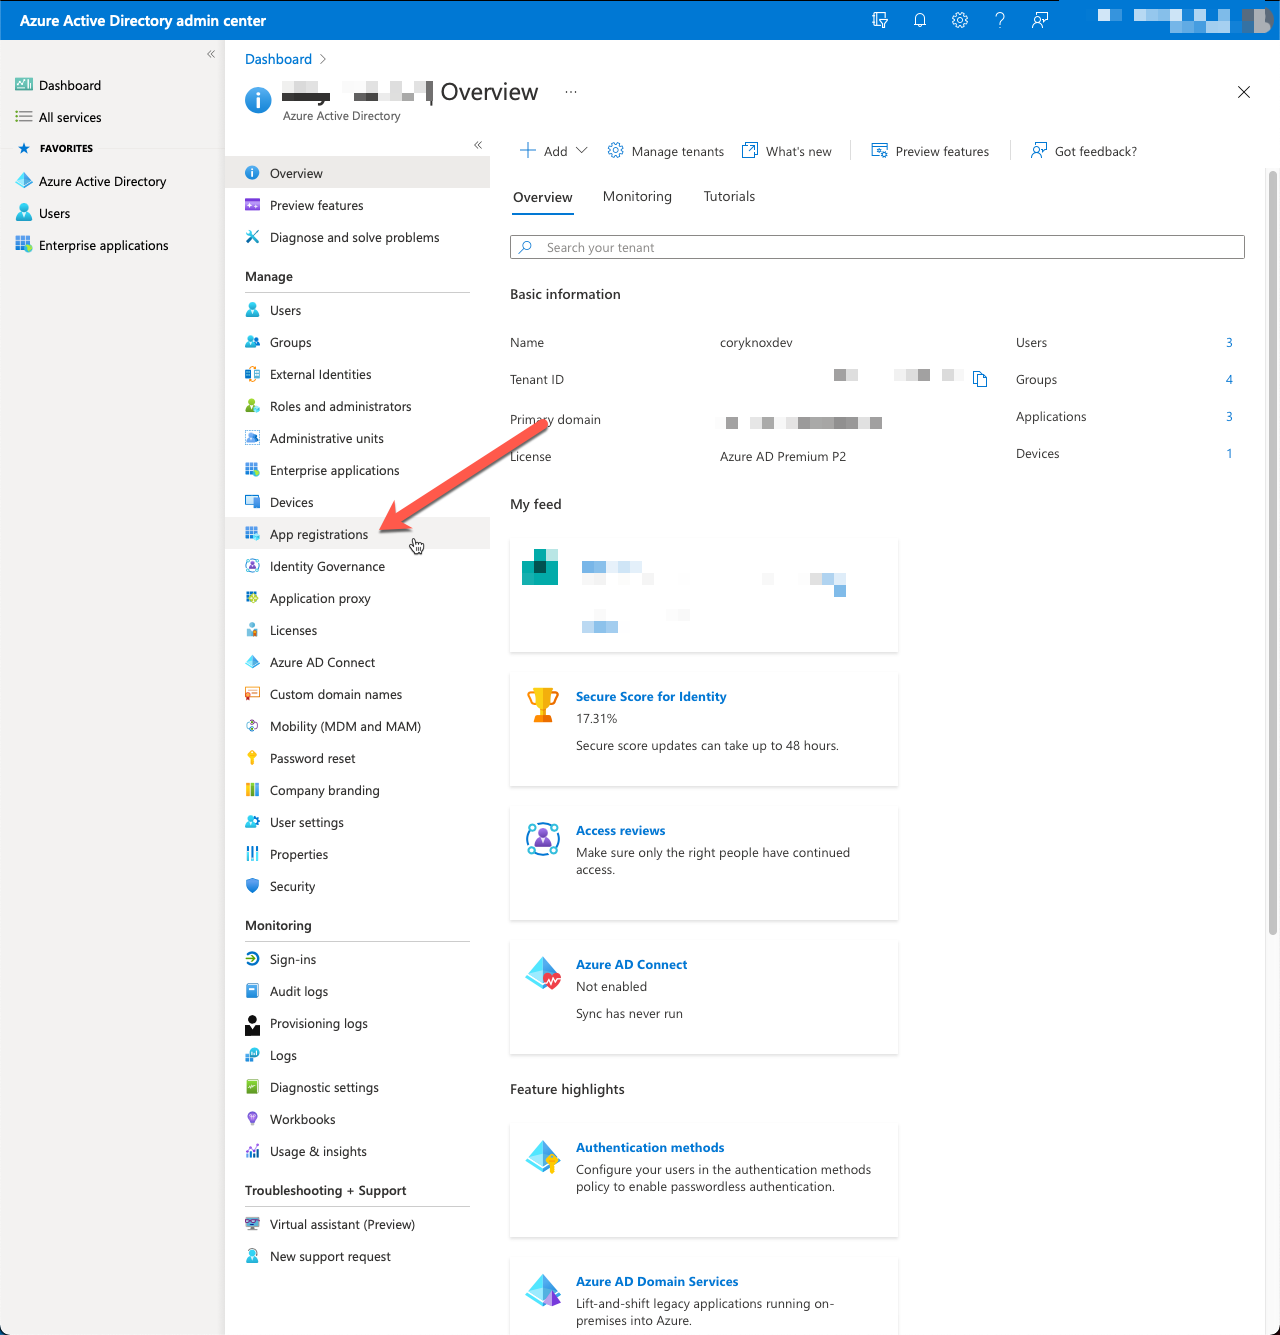
- Log into AzureAD Portal.
- Navigate to App registrations in Azure Active Directory.
- Click New Registration.
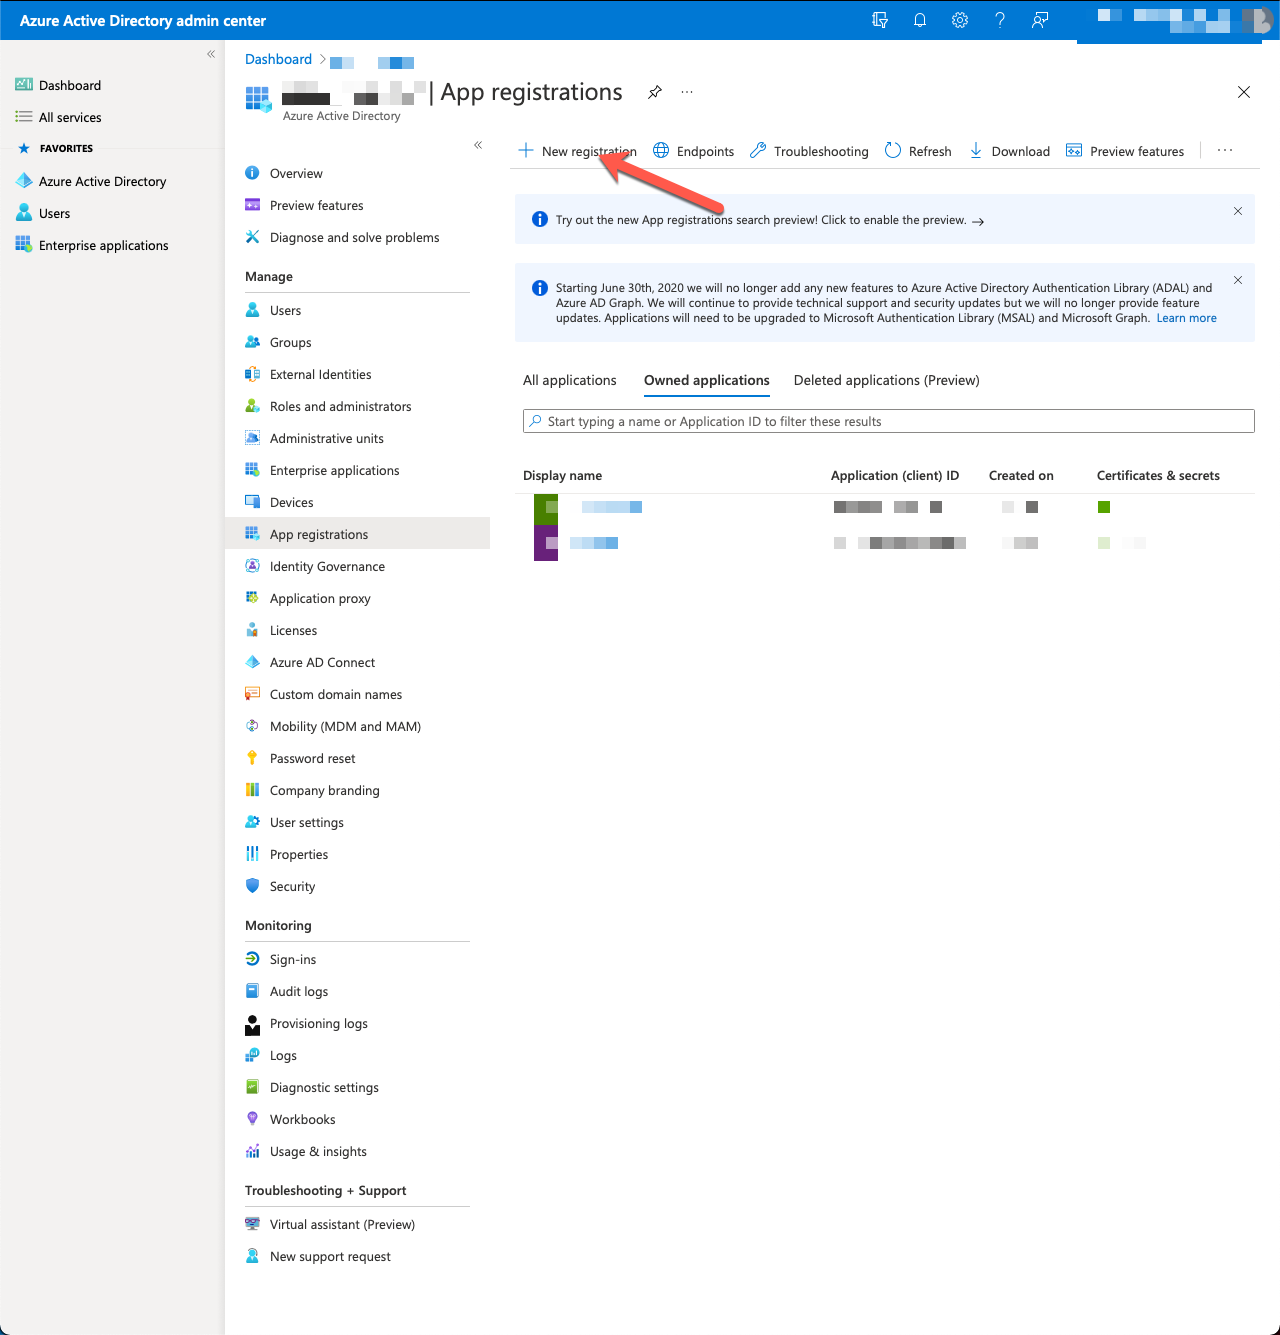
- Provide a name for your application and leave the rest of the fields blank/default.
- Click Register.
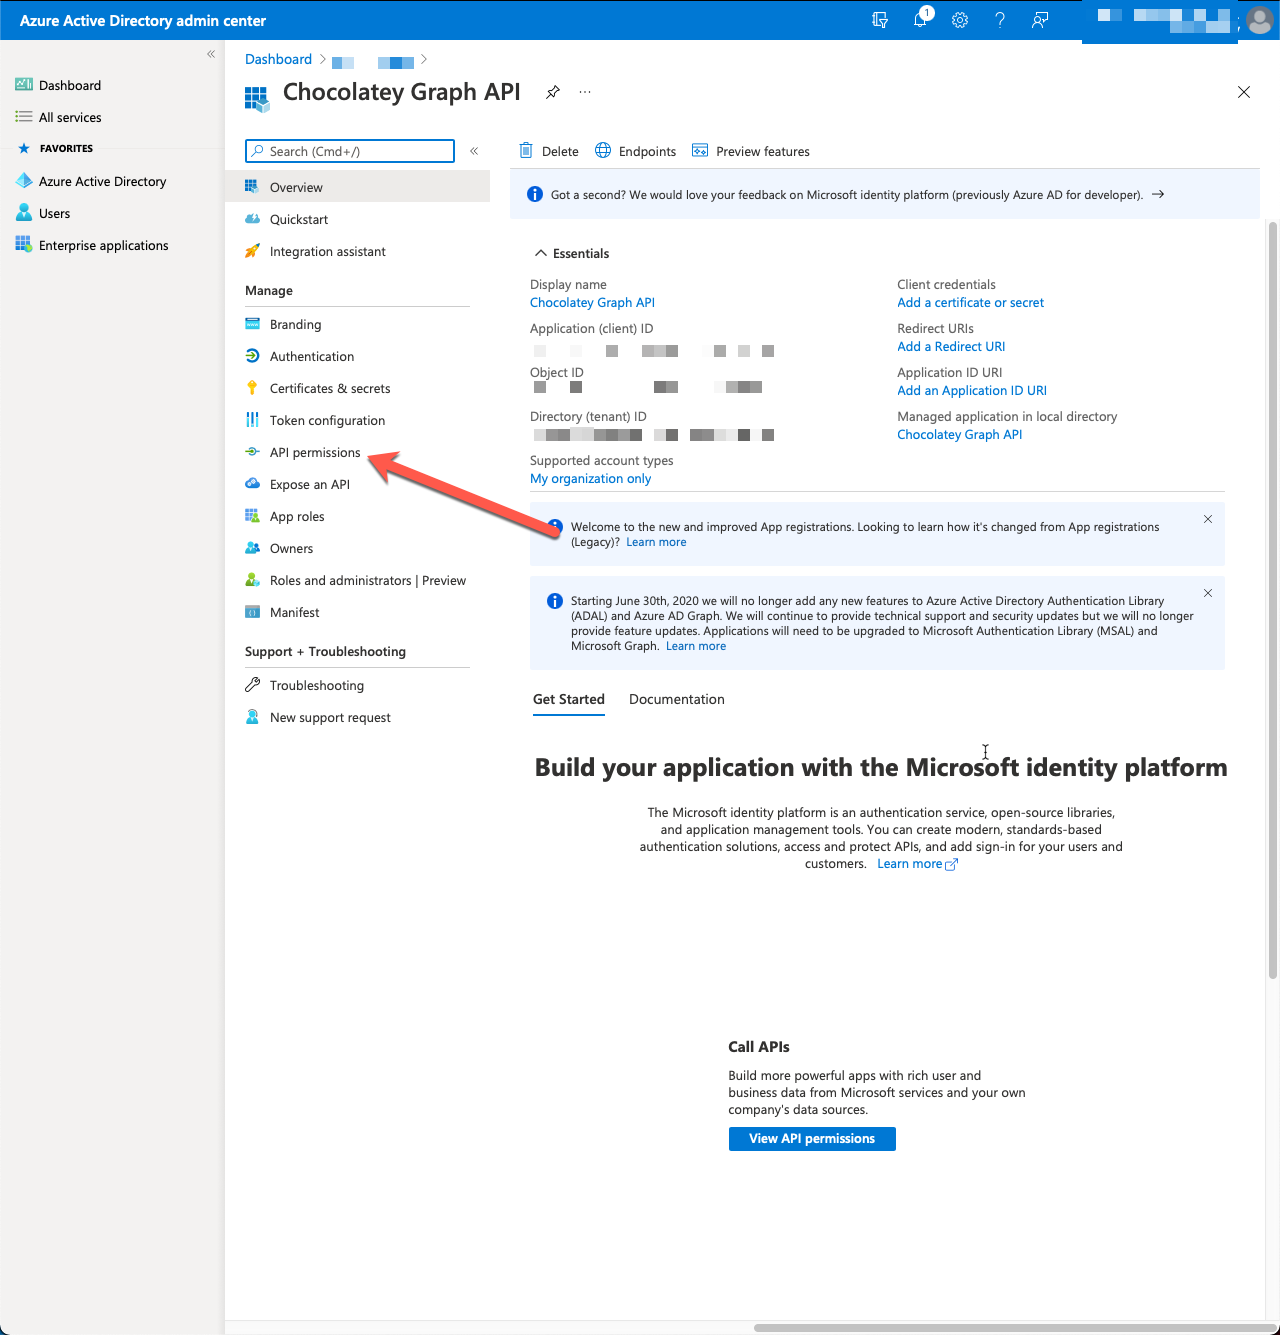
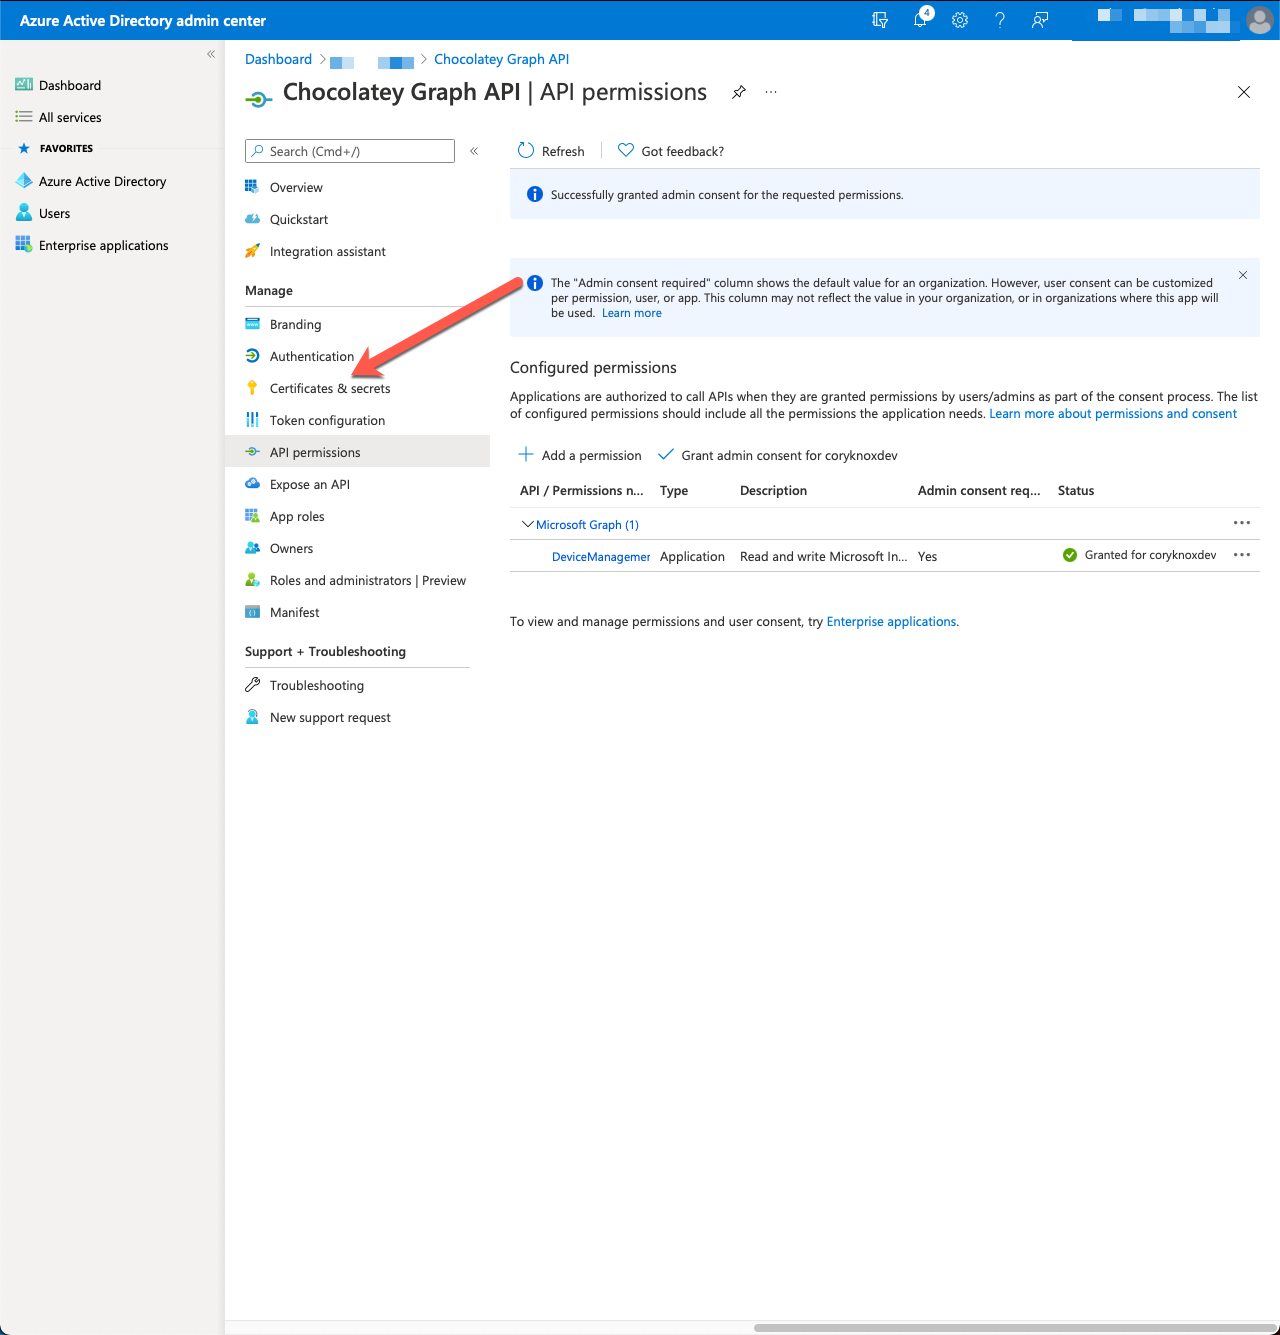
- Select API permissions from the menu on the left.
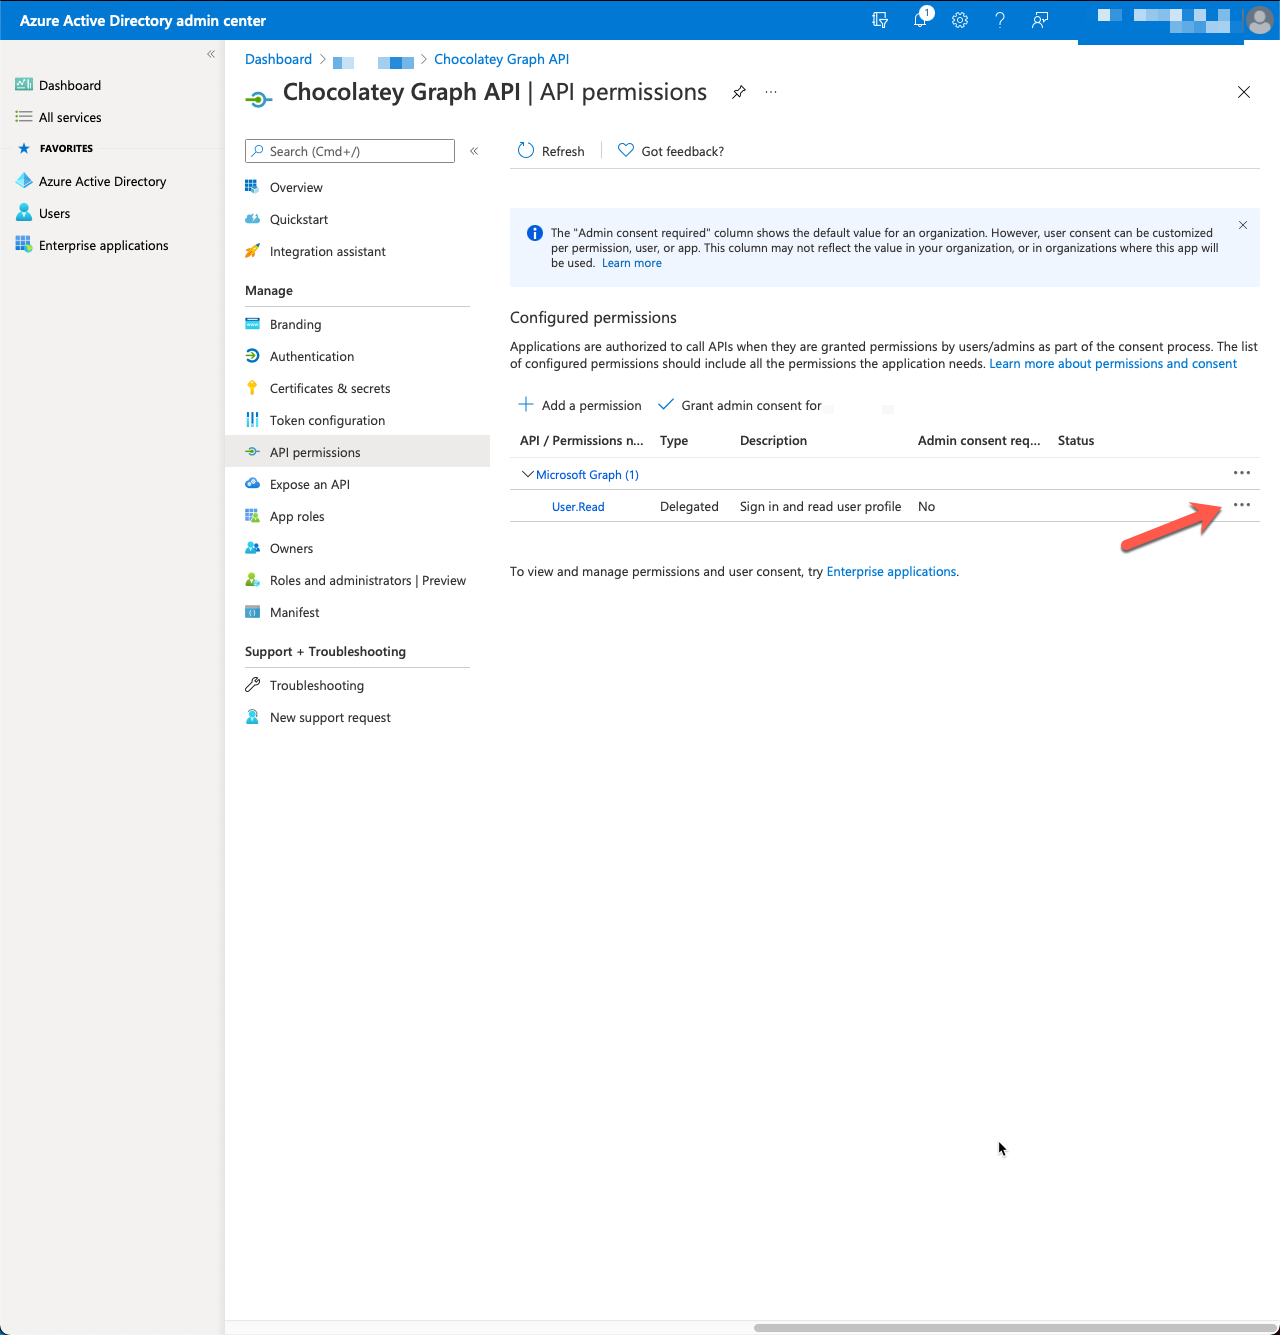
- Click the three dots for the menu on User.Read, choose Remove Permissions, and confirm you want to remove the permissions.
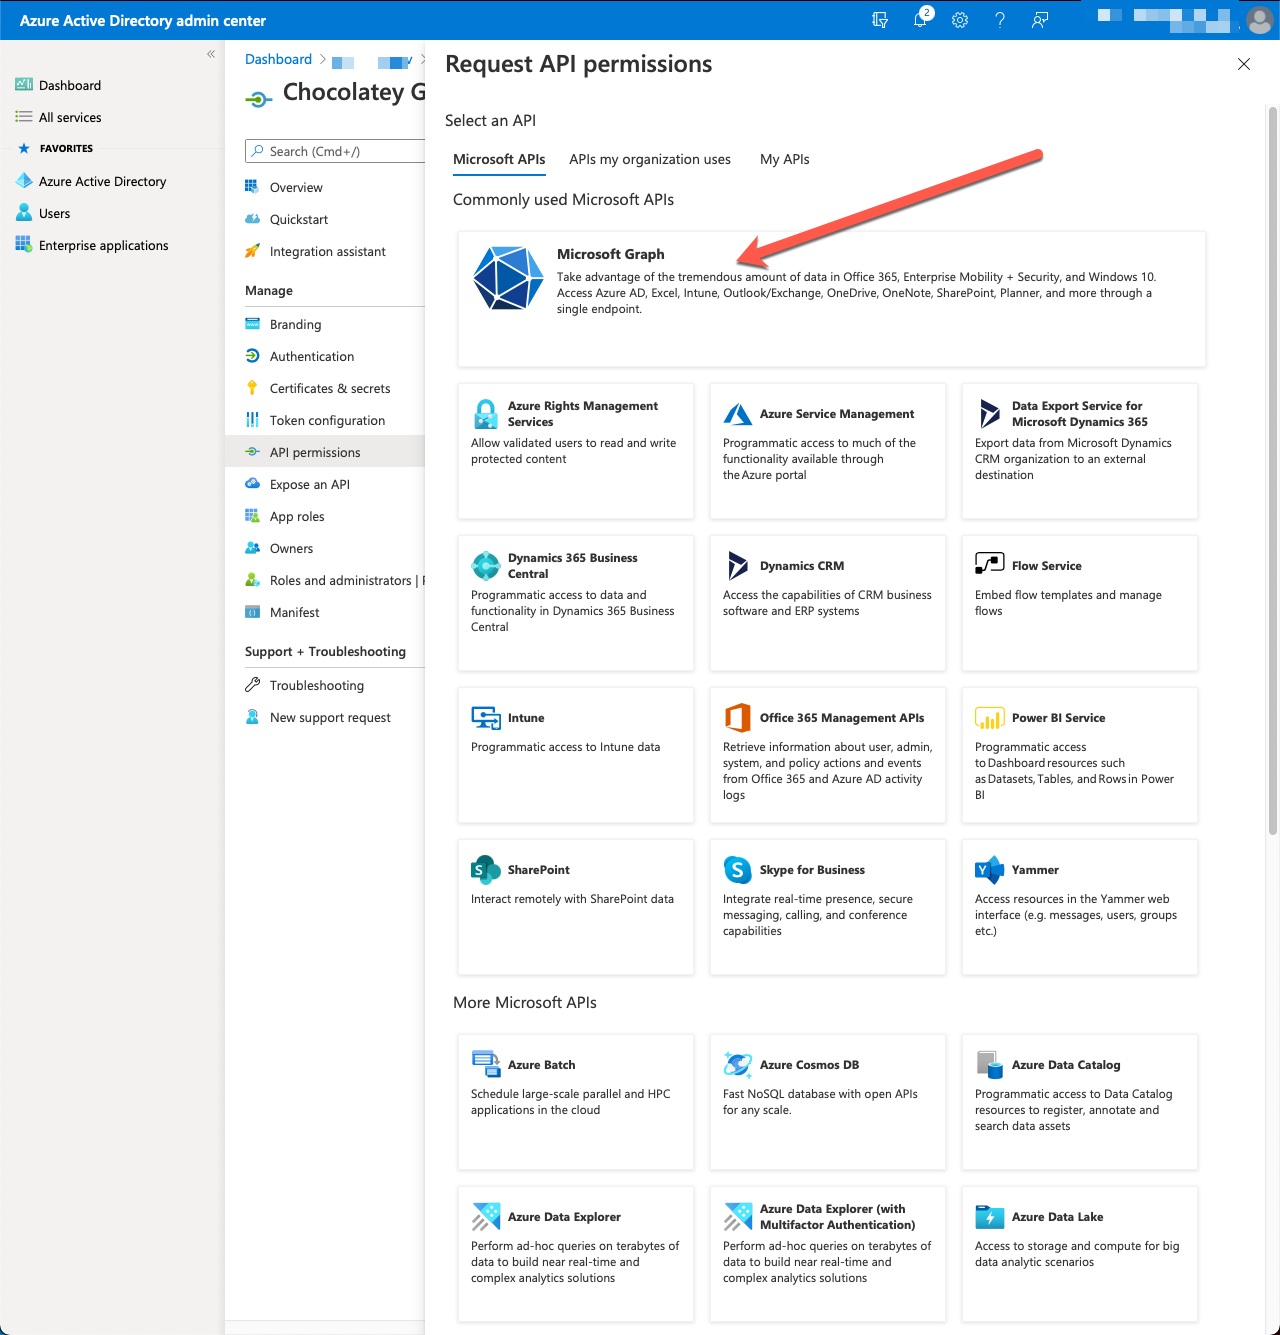
- Click Add a permission.
- Select Microsoft Graph.
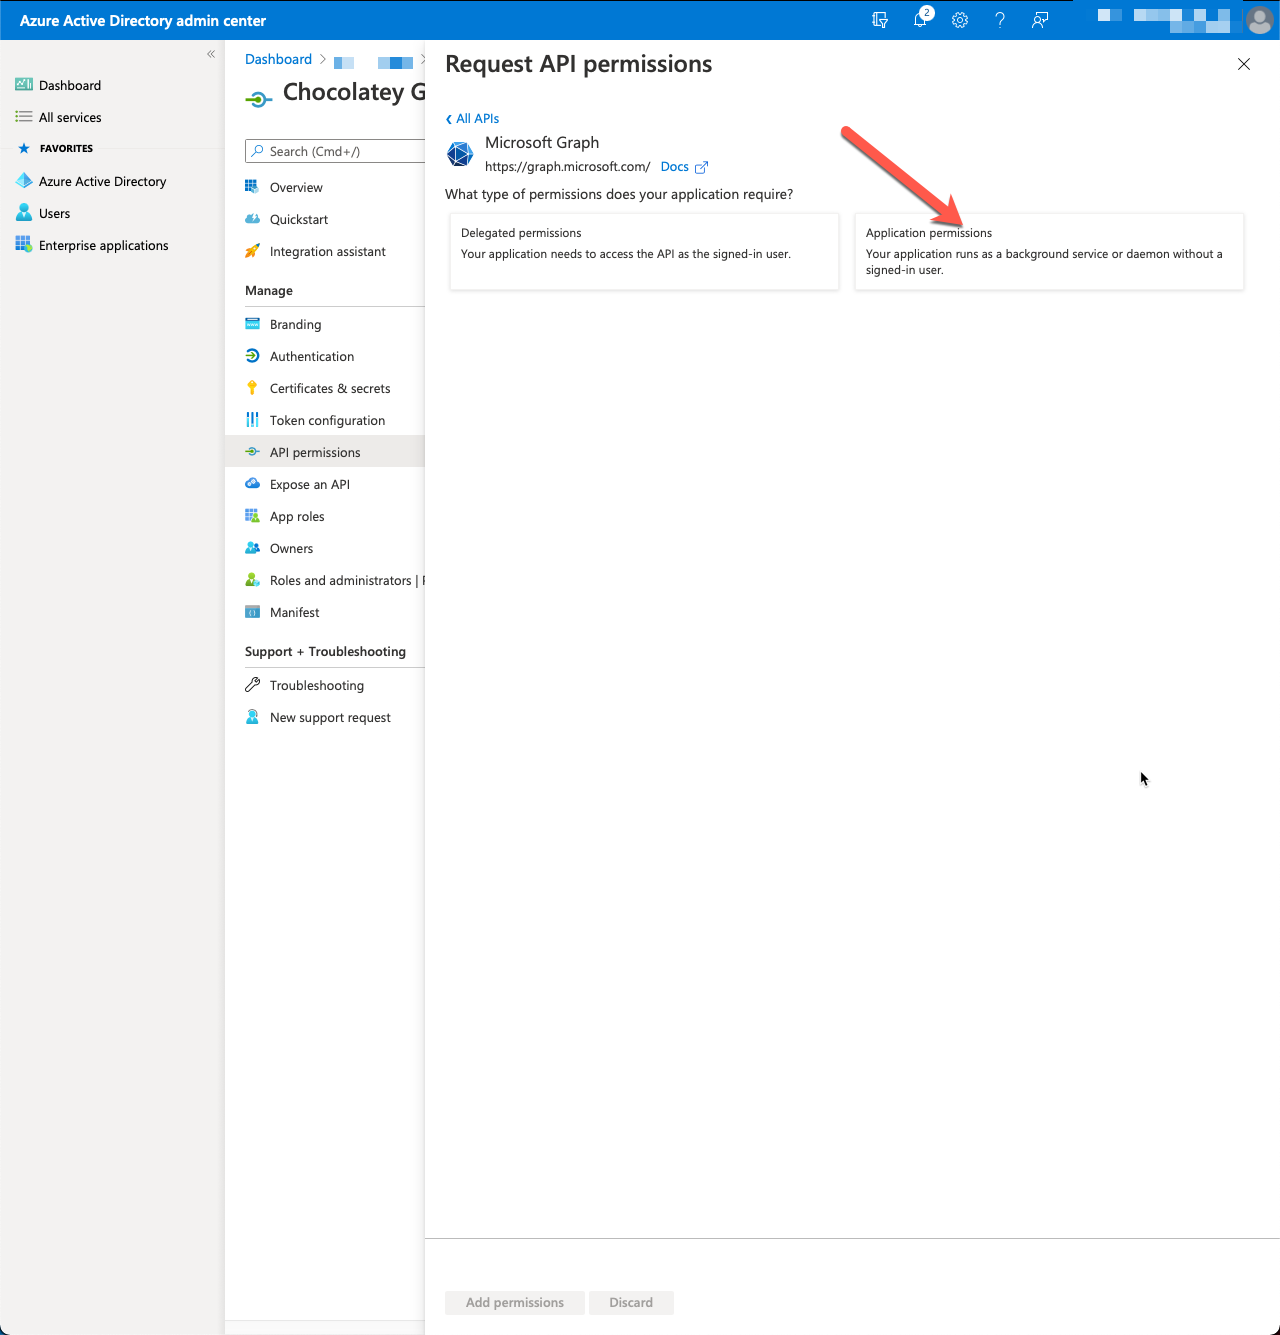
- Select Application permissions.
- Search for device and expand DeviceManagementApps and check off DeviceManagementApps.ReadWrite.All.
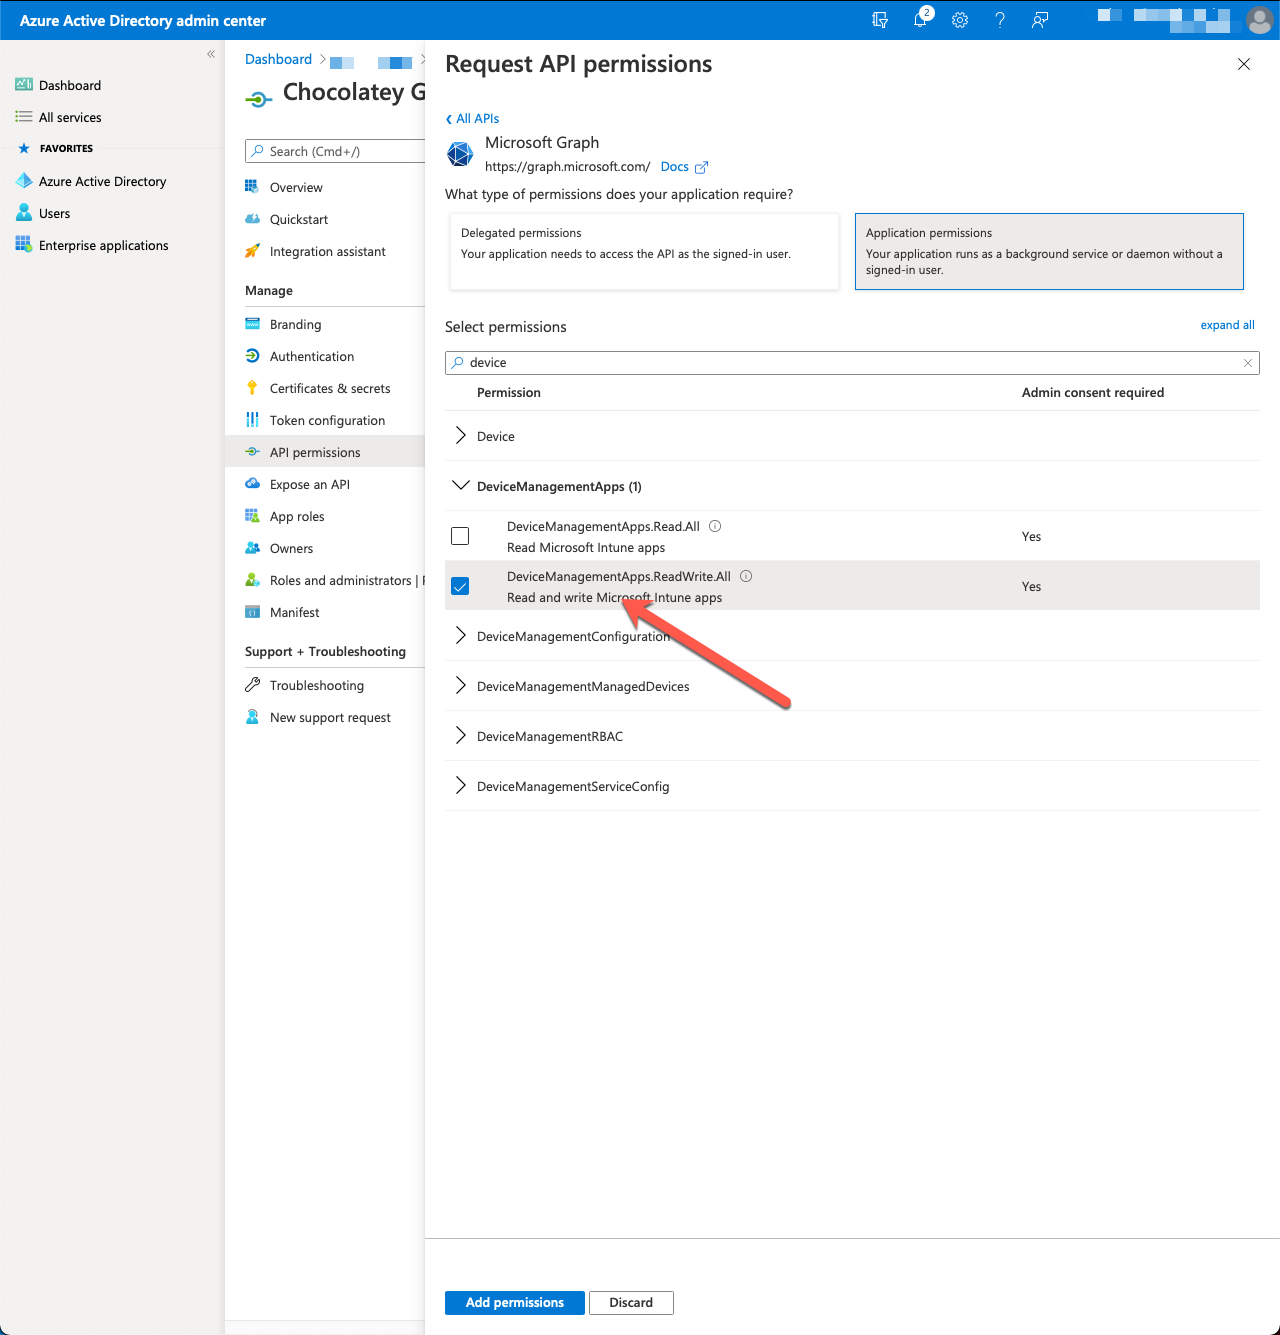
- Click Add permissions.
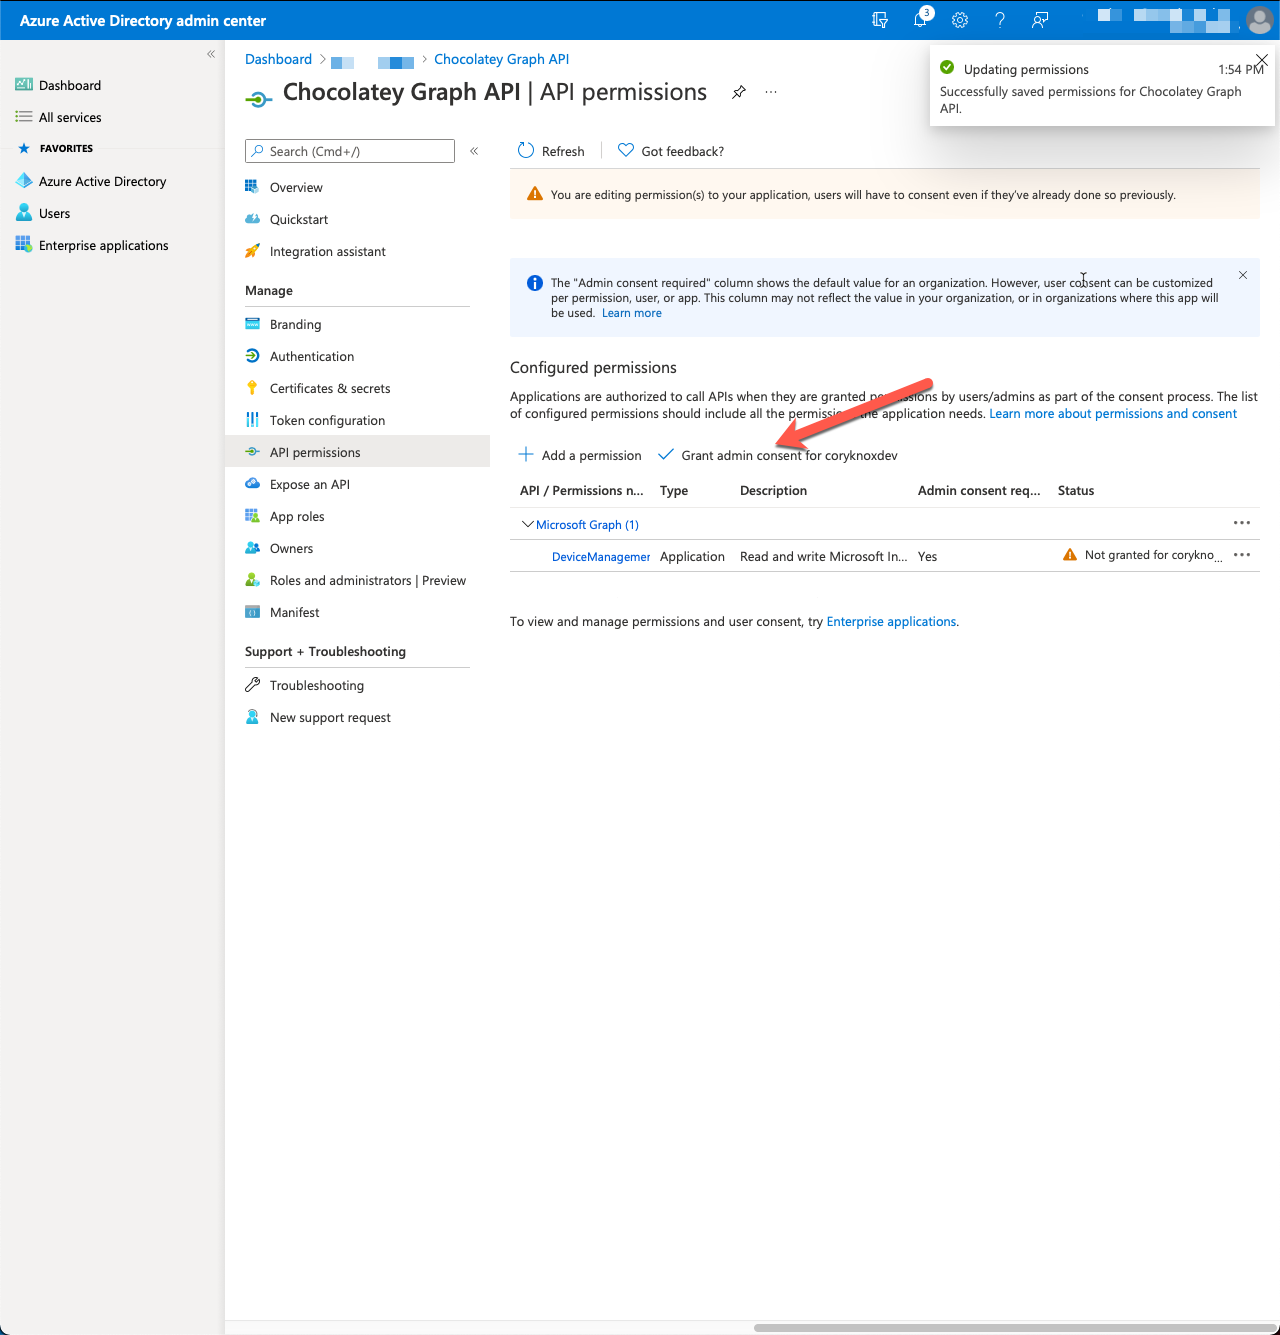
- Click Grant admin consent for <tenant> followed by Yes when prompted.
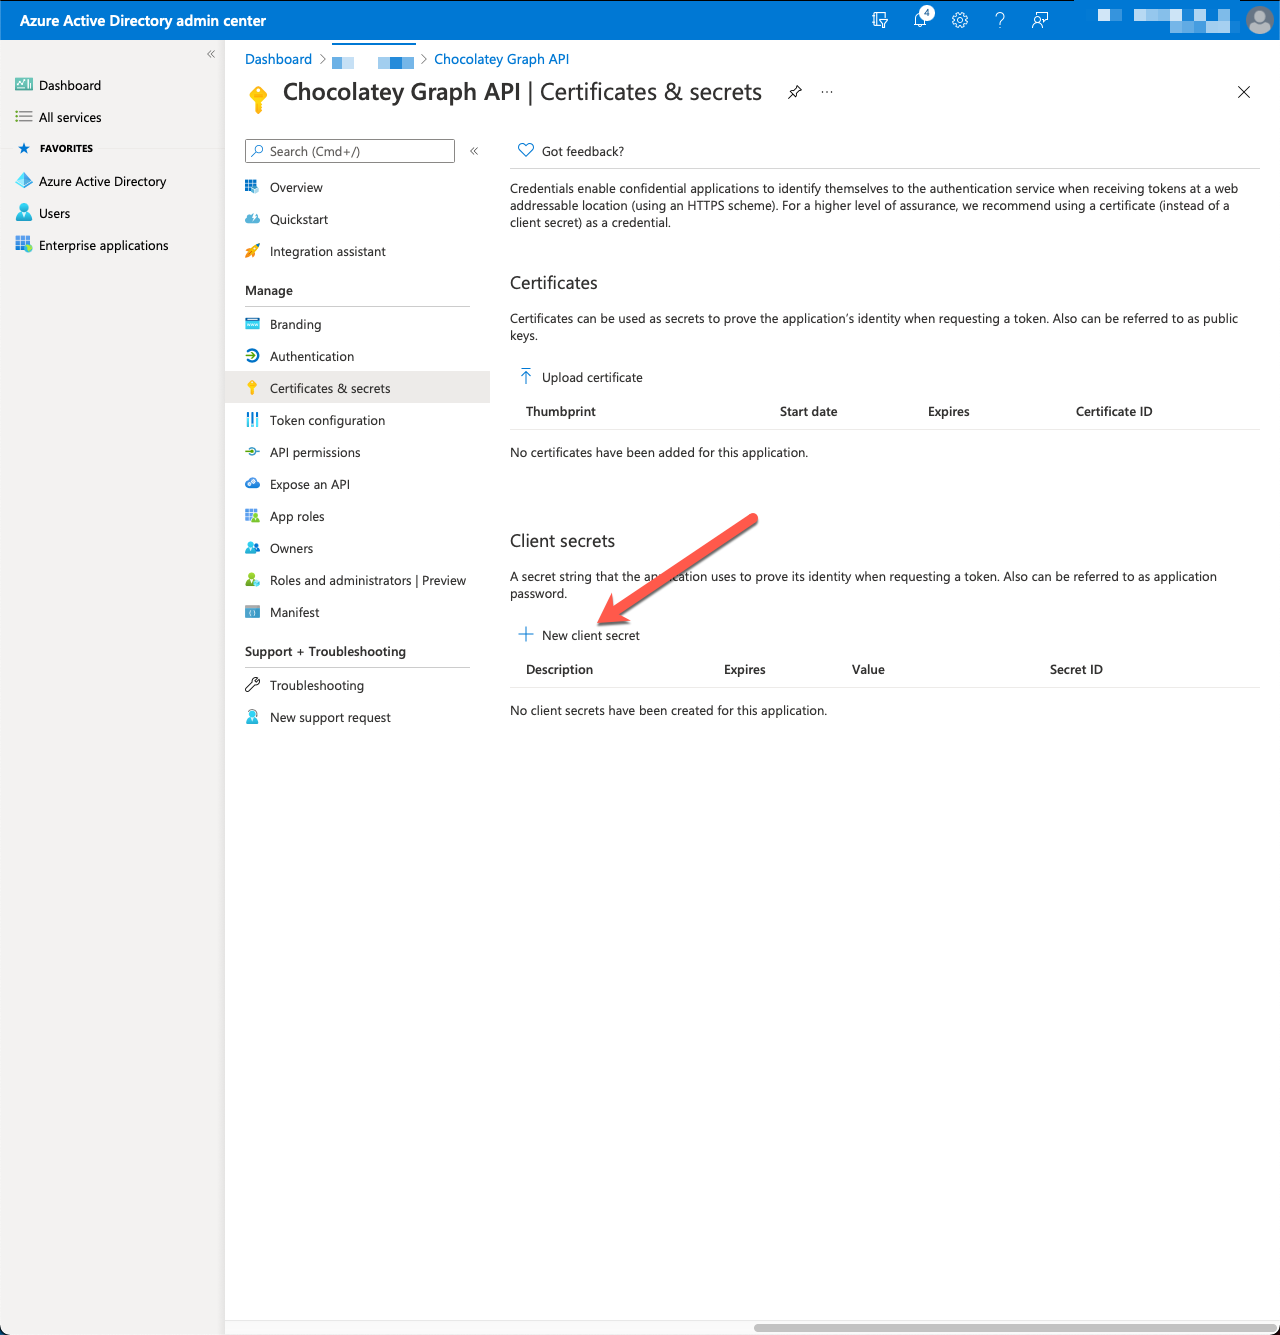
Create a secret for your Azure AD Application
WARNING
It’s important to note down the secret generated below as you cannot retrieve it again. If you forget the secret you will need to generate another one.
Once you’ve created your AzureAD Application, you need to generate a secret for it. The secret is what Chocolatey will use to authenticate with the Microsoft Graph API and should be protected like any other password.
- In the Application overview for your Application, select Certificates & secrets.
- Under Client secrets select New client secret.
- (Optional) Provide a description and expiry date for the client secret.
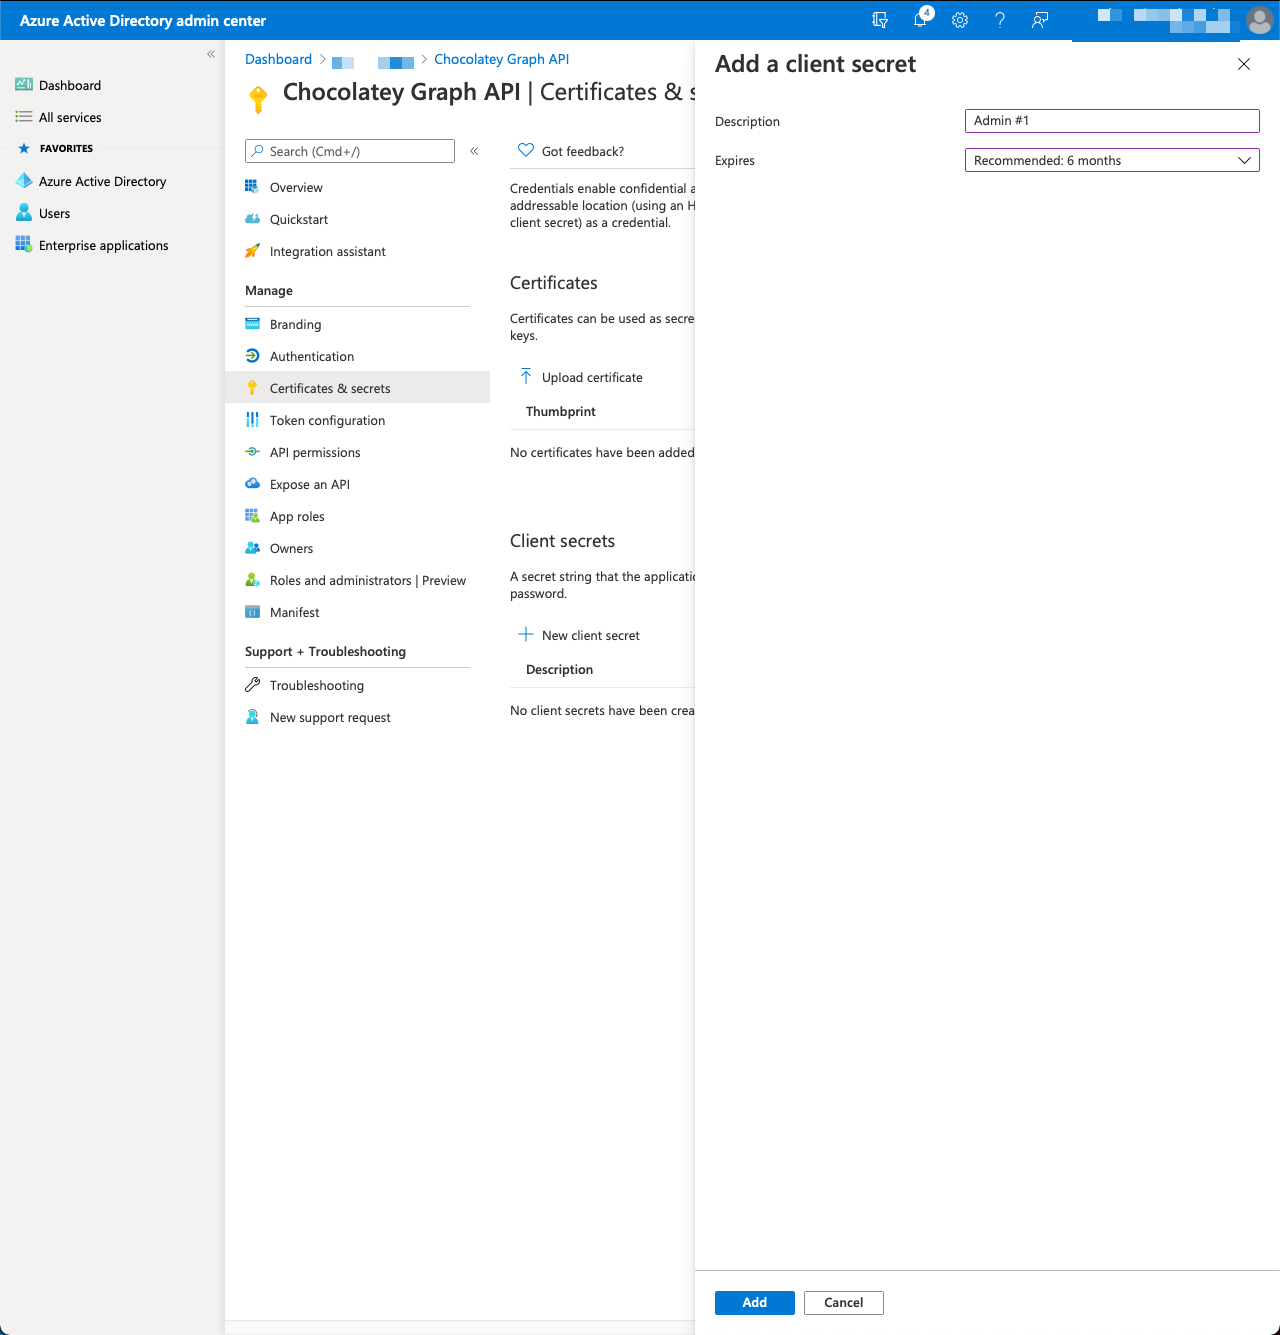
- Click Add.
- Note the Value down (it will not be shown again, so be sure to save it or you will need to generate another secret).
Obtaining and using your AzureAD Application information with Chocolatey
Once you’ve created both the AzureAD Application and the secret, you will want to obtain the registration information to use it with Chocolatey. Complete the folllowing steps to do so:
- Log into the AzureAD Portal and navigate to the App registration page for your application.
- Here you will find your Application (client) ID, and your Directory (tenant) ID.
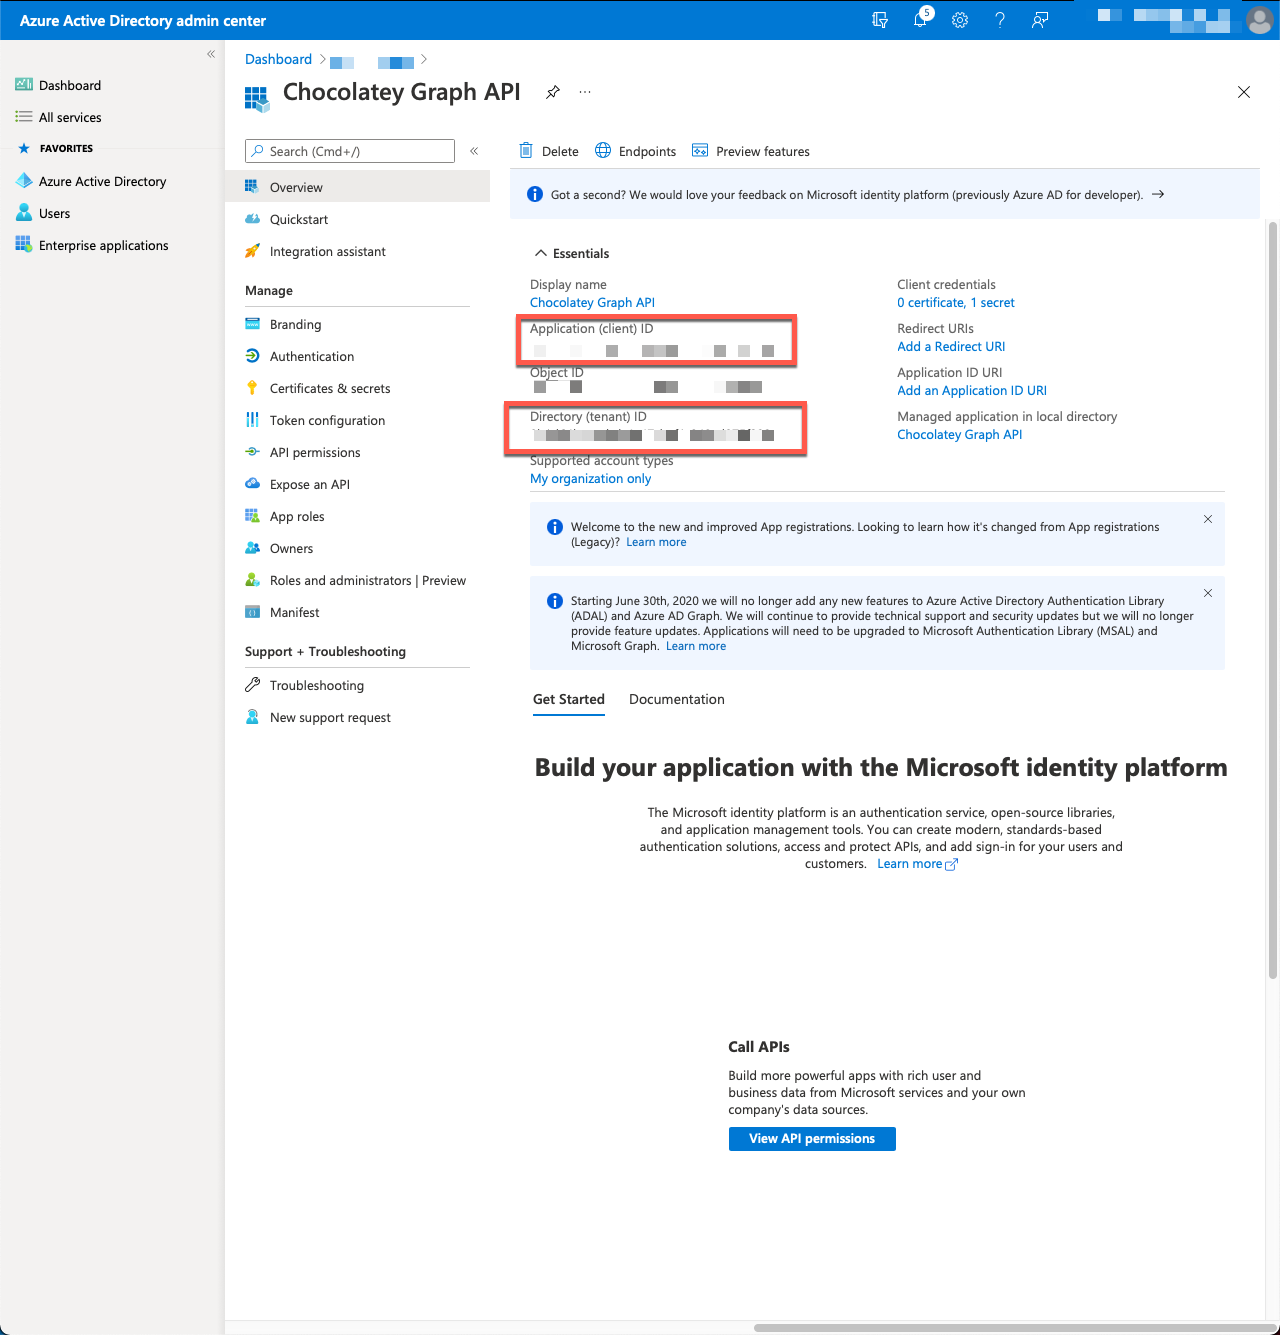
- The Application ID is the value used when we talk about TENANT CLIENT ID.
- The Directory ID is the GUID value used when we talk about INTUNE TENANT GUID.
- The Secret is the value used when we talk about TENANT CLIENT SECRET.