Use Chocolatey w/Proxy Server
Use Chocolatey w/Proxy Server
Proxy Setting Considerations
Proxy Configuration Priority
Chocolatey applies proxy configuration based on the order below:
- Command line arguments.
- Chocolatey configuration.
- Environment variables.
- System configured proxy server.
Known Limitations
Certain Chocolatey products are known to apply different proxy settings depending on circumstances.
- Chocolatey GUI - Downloading icons does not honor Chocolatey CLI proxy settings.
- Chocolatey Licensed Extension - VirusTotal checking at runtime does not use any proxy.
- Chocolatey Agent - Agent communications do not use any proxy configuration.
Installing Chocolatey From Behind a Proxy Server
When trying to install Chocolatey behind a proxy server, you may be faced with one of the following errors:
Get Response returned: (407) Proxy Authentication Required
or
The underlying connection was closed: Could not establish trust relationship for the SSL / TLS secure channel.
Steps to help address this:
- Copy the install.ps1 file locally.
- Open a PowerShell command line as administrator.
- If not using a proxy with authentication, set the default proxy credentials with
[Net.WebRequest]::DefaultWebProxy.Credentials = [Net.CredentialCache]::DefaultCredentials. - Set the following environment variables:
$env:chocolateyProxyLocation(in the formatproxyserver:proxyport, see below for an example).
- If your proxy requires authentication, set the following variables:
$env:chocolateyProxyUser(if using a domain account, ensure you have the appropriate domain prefix for the account, e.g.AD\UserNameorUserName).$env:chocolateyProxyPassword.
- With that same shell open where the environment variables are set, run the downloaded script to install Chocolatey.
In PowerShell, it looks like this:
[Net.WebRequest]::DefaultWebProxy.Credentials = [Net.CredentialCache]::DefaultCredentials
$env:chocolateyProxyLocation = 'https://local.proxy.address:8001'

# Un-comment the following lines if your proxy server requires explicit authentication and
# substitute your username and password.
#$env:chocolateyProxyUser = 'username'
#$env:chocolateyProxyPassword = 'password'

# Run the downloaded install script
& "C:\Path\to\script\install.ps1"
NOTE
This will only work with the installation methods that call https://community.chocolatey.org/install.ps1 (or use a similar script, like Puppet/Chef scripts do) as part of the install.
Troubleshooting Installation
You’ve tried everything and Chocolatey still won’t install from https://community.chocolatey.org -
The underlying connection was closed: Could not establish trust relationship for the SSL / TLS secure channel.
It could also be that your trusted root certificates are missing or not up to date (Windows 2012 does not install root certificates by default). You will need to download and install the following certificate into your LocalMachine’s Trusted Root Certification Authorities certificate store.
To access community.chocolatey.org and packages.chocolatey.org:
- GoDaddy Secure Certificate Authority - G2
- File:
gdroot-g2.crt - SHA1 Thumbprint:
47BEABC922EAE80E78783462A79F45C254FDE68B - SHA256 Thumbprint:
45140B3247EB9CC8C5B4F0D7B53091F73292089E6E5A63E2749DD3ACA9198EDA - Name:
GoDaddy Class 2 Certification Authority Root Certificate - G2
- File:
System Proxy Settings
Chocolatey by default already supports system set proxy servers
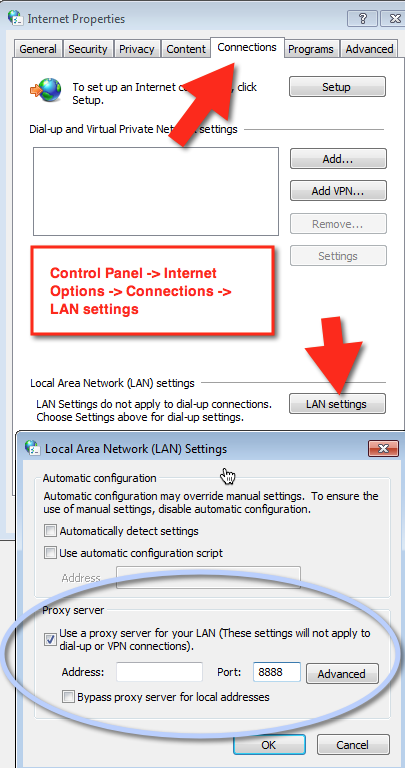
NOTE
Unfortunately proxy bypass lists may not be available when using this method. We recommend explicit proxy settings.
Existing Proxy Environment Variables
Chocolatey will automatically pick up the following environment variables if they are already set:
http_proxy.https_proxy.no_proxy- Chocolatey CLI will treat this as a comma separated list of regex values.
Explicit Proxy Settings
Chocolatey has explicit proxy support through the choco config command.
You can simply configure up to 5 settings and Chocolatey will use a proxy server. proxy is required and is the location and port of the proxy server. The values for user/password are only used for credentials when both are present.
choco config set --name="'proxy'" --value="'<LOCATION-AND-PORT>'"
choco config set --name="'proxyUser'" --value="'<USERNAME>'" #optional
choco config set --name="'proxyPassword'" --value="'<PASSWORD>'" # optional, will be encrypted in the configuration file
choco config set --name="'proxyBypassList'" --value="'<REGEX-BYPASS-LIST-COMMA-SEPARATED>'" # optional
choco config set --name="'proxyBypassOnLocal'" --value="'true'" # optional
~```

### Example

Running the following commands:

```powershell
choco config set --name="'proxy'" --value="'http://localhost:8888'"
choco config set --name="'proxyUser'" --value="'bob'"
choco config set --name="'proxyPassword'" --value="'123Sup#rSecur3'"
choco config set --name="'proxyBypassList'" --value="'http://localhost,http://this.location/'"
choco config set --name="'proxyBypassOnLocal'" --value="'true'"
Results in the following items being added to the config file:

Explicit Proxy Settings at Runtime
You can pass proxy information at runtime with each command. See https://github.com/chocolatey/choco/issues/1173
--proxy="'value'" --proxy-user="'<user>'" --proxy-password="'<pwd>'" --proxy-bypass-list="'<REGEX-BYPASS-LIST-COMMA-SEPARATED>'" --proxy-bypass-on-local
What to do if My Proxy is Socks?
It may just work. It hasn’t been validated yet.