Branding Chocolatey Applications (C4B)
Branding Chocolatey Applications (C4B)
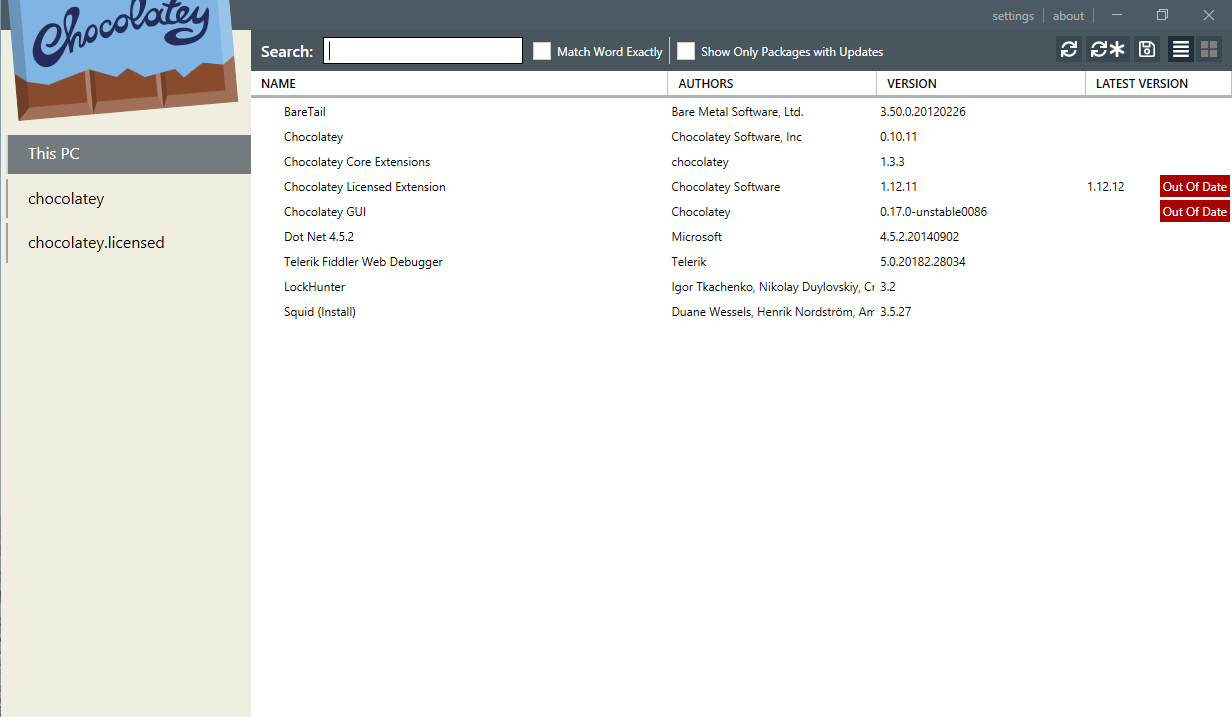
We are aware that some of our customers want to be able to brand Chocolatey GUI so that it appears as their own internal application. Out of the box, Chocolatey GUI’s main screen looks like this:

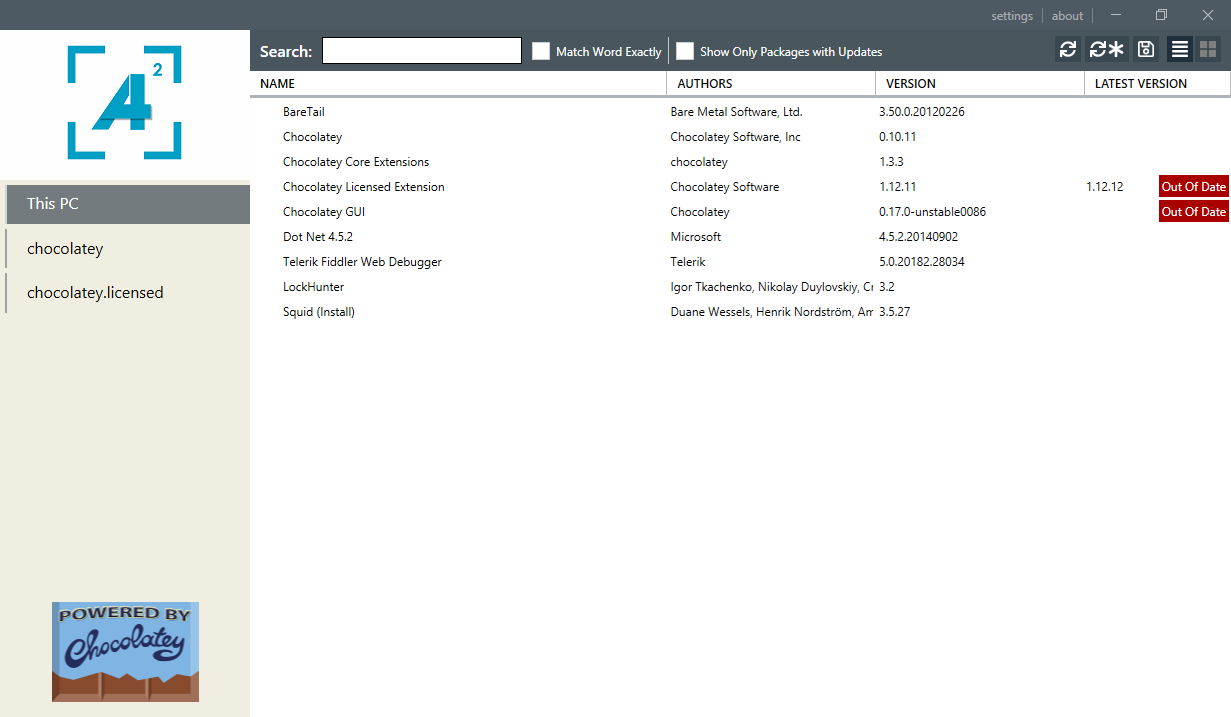
However, with branding applied, Chocolatey GUI’s main screen can instead look like this:

Here, the logo of a company called A Squared Software Ltd is being used, instead of the main Chocolatey logo. In addition, a Powered By Chocolatey logo is added to the bottom left corner of the application.
Requirements for branding
NOTE
Branding of Chocolatey GUI is only available to our Business License customers, and requires the Chocolatey GUI Licensed Extension (chocolateygui.extension) to be installed, alongside Chocolatey GUI.
The chocolateygui-branding.template package
To assist in streamlining branding configuration, we created the chocolateygui-branding.template template package that is hosted on our licensed feed.
This template package provides a framework for customers to create a custom branding package specifically for deploying Chocolatey GUI with their branding already included.
The custom branding package calls on chocolateygui and chocolateygui.extension as dependencies, so you’ll want to ensure that you already have those packages in your
internal repository.
The branding image files
There are also a number of image files that are required. These image files have to be named exactly as the following:
- icon_256x256.ico
- logo_150x250.png
- splash_700x302.png
- splash_975x421.png
- splash_1250x540.png
NOTE
The reason that there are multiple splash screen images is because Chocolatey GUI makes a decision, based on the resolution of the screen, which splash screen image to display to the user.
The numbers in the file names are a suggestion as to the width and height of each image. While the images don’t have to exactly match these dimensions, it is recommended that they are as close as possible to these dimensions.
Location of branding files
Chocolatey GUI looks for custom branding files in the Chocolatey
installation directory (normally C:/ProgramData/chocolatey), and then in a folder
called branding/gui. i.e. it will look in the following folder:
C:/ProgramData/chocolatey/branding/gui
When the branding image files are placed in the gui folder and Chocolatey GUI is launched with the Chocolatey GUI Licensed Extension
installed, a file called ChocolateyGuiBranding.dll is created, which contains all the image files as embedded resources.This approach is
used in order to optimize the loading of the assets. Once this ChocolateyGuiBranding.dll has been created, Chocolatey GUI will use it each
time the application runs. The original image asset files are no longer required, and can be removed.
Creating the custom branding package
- Ensure that you have
chocolateyguiandchocolateygui.extensioninstalled. If you do not, runchoco install chocolateygui.extension -yand both packages and their dependencies will be installed through dependency resolution. - Install the
chocolateygui-branding.templatepackage:choco install chocolateygui-branding.template -y - Create your new custom branding package based on the template:
choco new <package_id> --template='chocolateygui-branding' - Create the directory to initially store the branding files:
New-Item 'C:\ProgramData\chocolatey\branding\gui' -ItemType Directory - Move your branding image files to the directory above and launch Chocolatey GUI. This will create the
ChocolateyGuiBranding.dllatC:\ProgramData\chocolatey\branding\gui. - Place the
ChocolateyGuiBranding.dllin the tools folder in your custom branding package and compile the package by runningchoco pack 'path\to\nuspec' - You’re done! You can push the custom branding package to your internal repository for testing or production use.
Deploying the custom branding package
Once the custom branding package has been created, you can use a Chocolatey Central Management deployment to deploy branding to your endpoints.
You can also use any means you would normally use to deploy or install a Chocolatey package to a machine, which is the beauty of this simple approach to branding Chocolatey GUI!
Branding in action
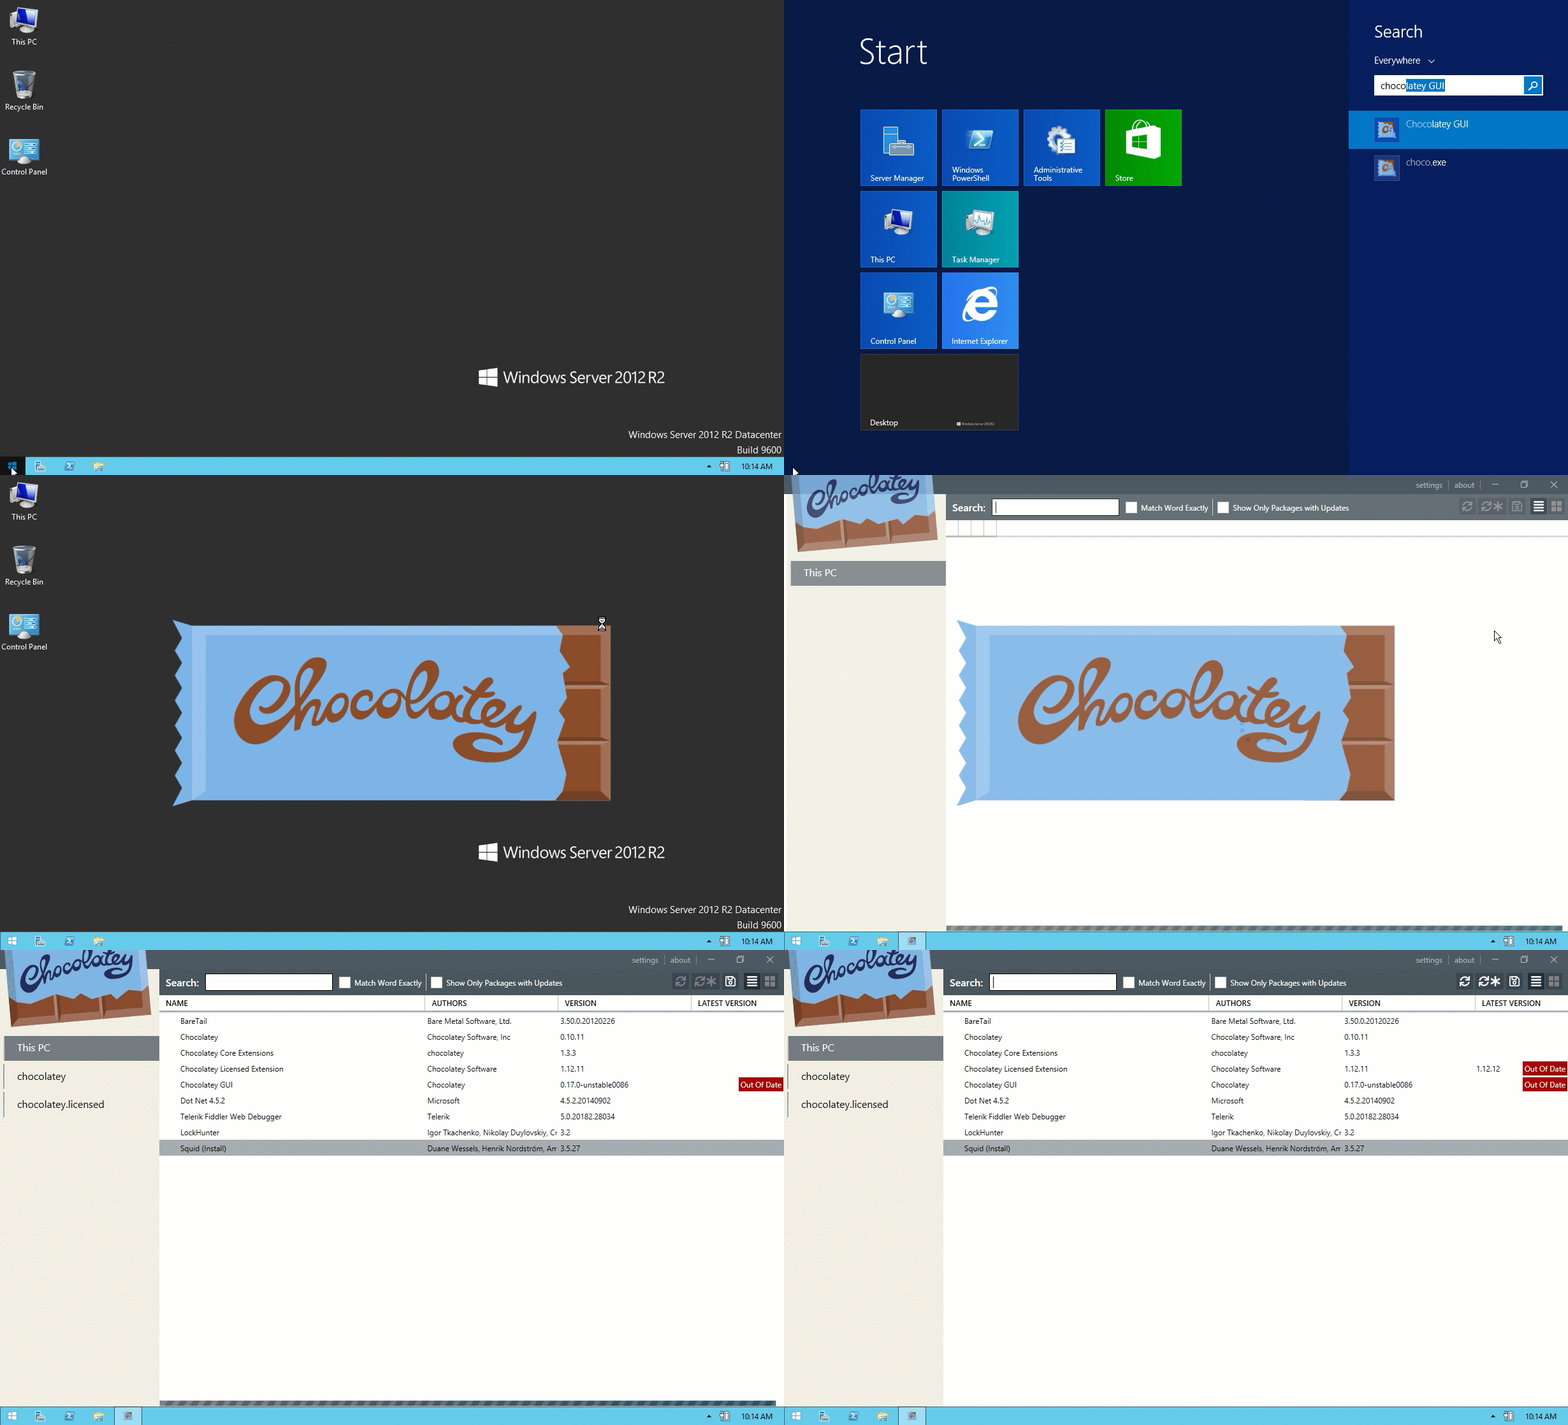
The below GIF shows the default opening of the Chocolatey GUI application when there is no branding applied.

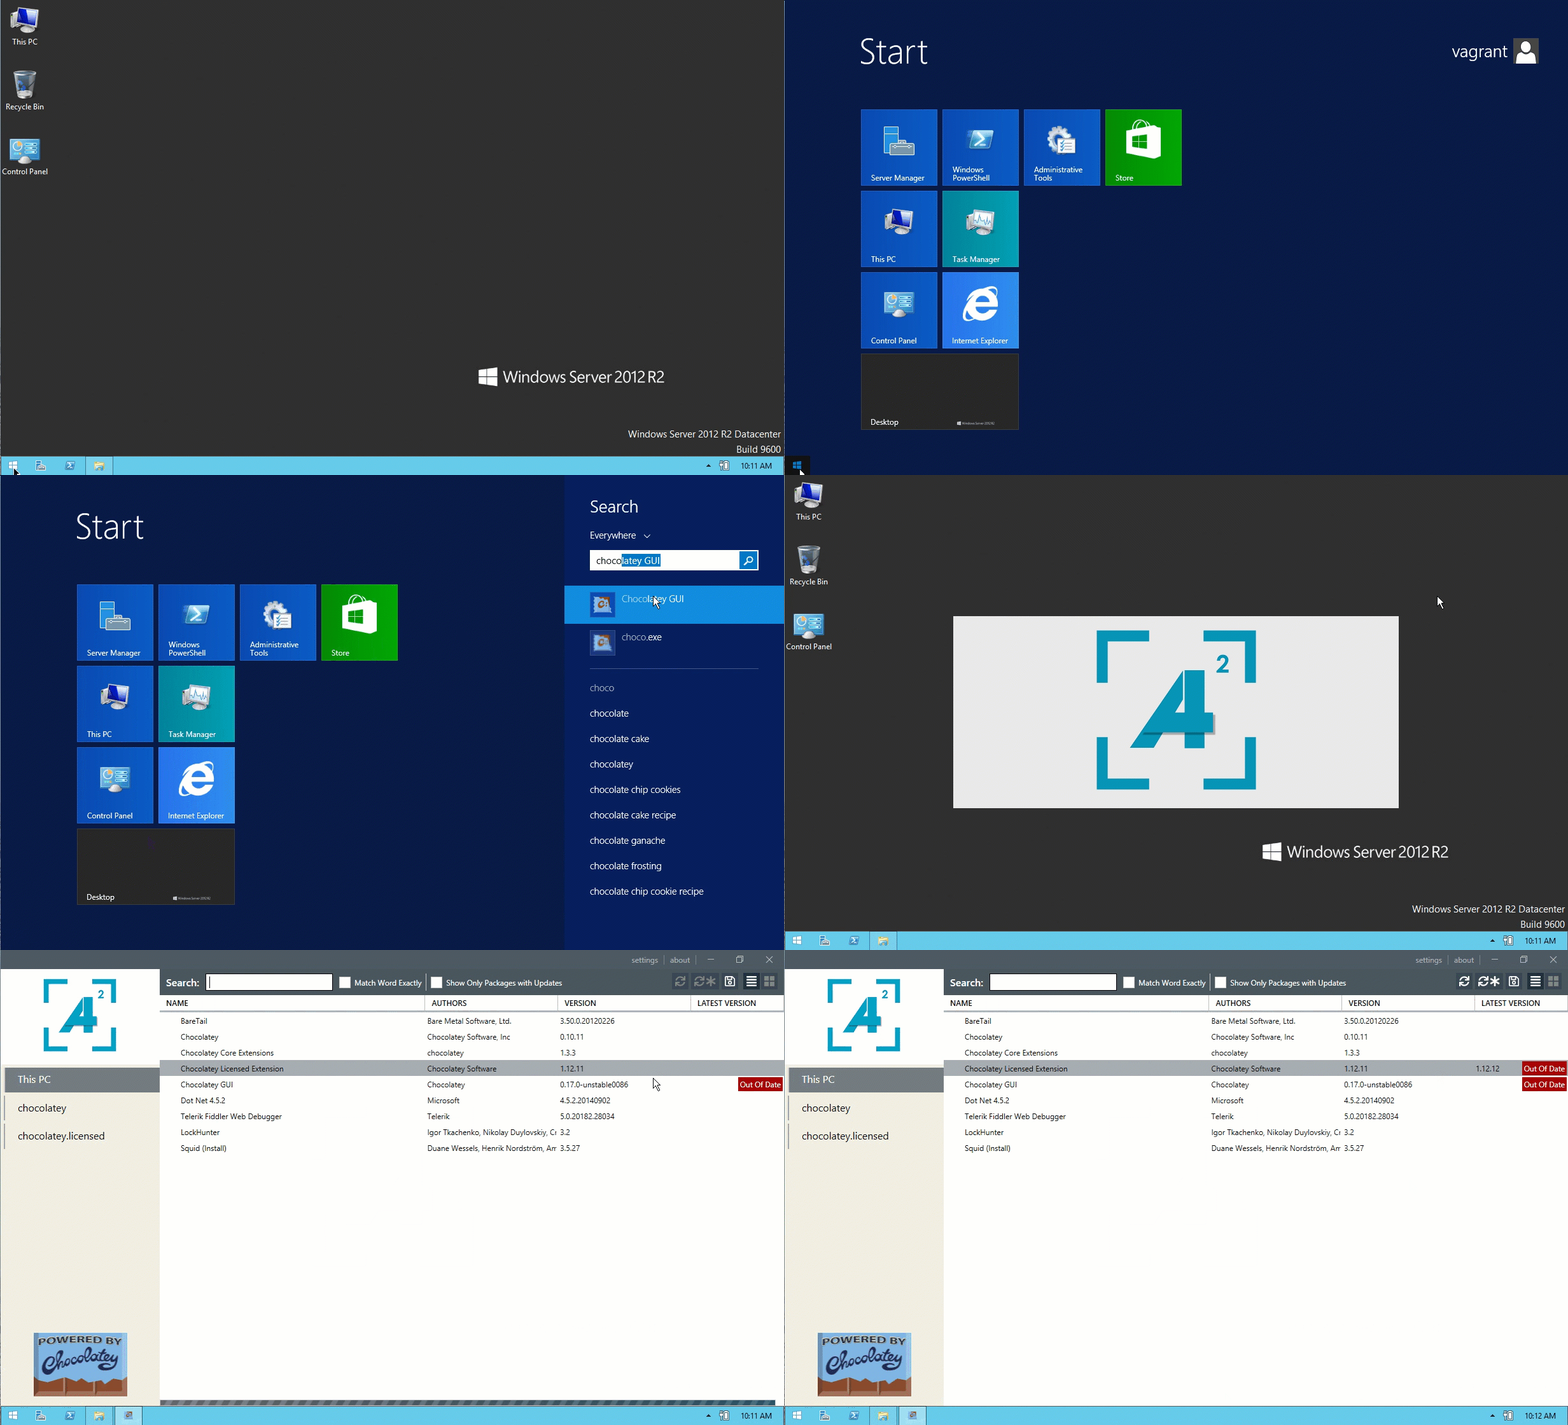
In this GIF, we see branding being applied to the Chocolatey GUI application.

Notice that the splash screen image has been replaced, as well as the logo at the top left of the application.
NOTE
There is an open issue regarding the icon in the taskbar not being correctly replaced, visit https://github.com/chocolatey/chocolatey-licensed-issues/issues/157 for more information.
NOTE
To see all feature videos for Chocolatey for Business, please visit https://chocolatey.org/resources/features#c4b.