Deployment Plans
Deployment Plans
Description
Chocolatey Central Managements’ Deployments functionality allows for pre-defined actions to be executed across any Chocolatey-managed computers.
Deployment actions can be defined as simple choco commands, or as fully-fledged PowerShell scripts.
Creating a Deployment Plan
To setup a new Deployment Plan, you’ll need to create a Deployment Plan which defines the steps for the Deployment Plan and the Computers which will run them.
In order to get started, you’ll need at least the Create New Deployment Plan and/or the Create New Privileged Deployment Plan permissions applied to your user account in Chocolatey Central Management.
You will also need to have at least one Group of computers already defined.
-
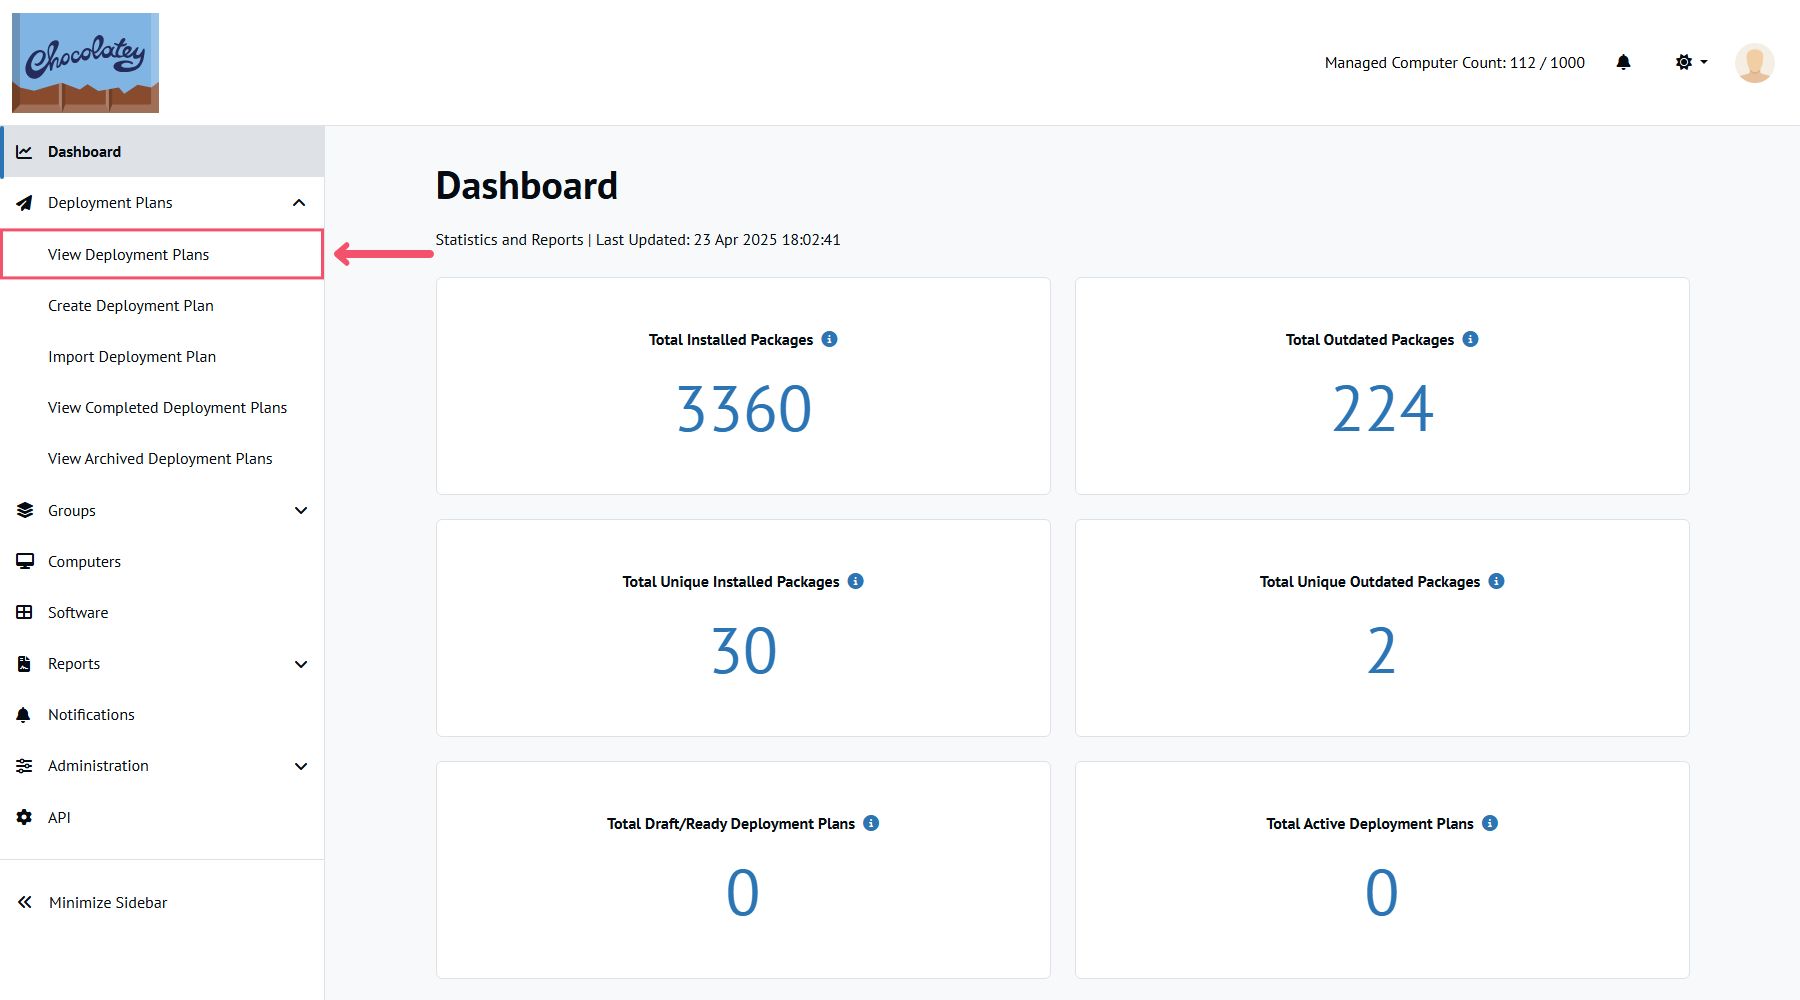
From the Chocolatey Central Management dashboard, select Deployment Plans from the left sidebar and select the View Deployment Plans option.
-
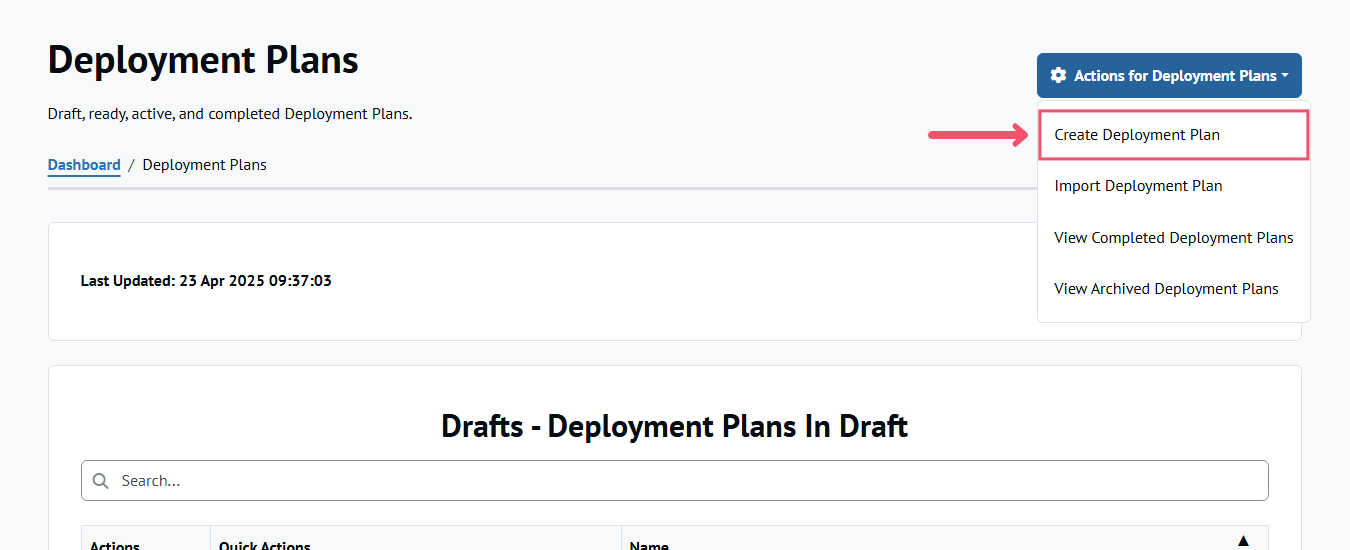
Select the Actions for Deployment Plans button and select the Create Deployment Plan menu option at the top of the page.
-
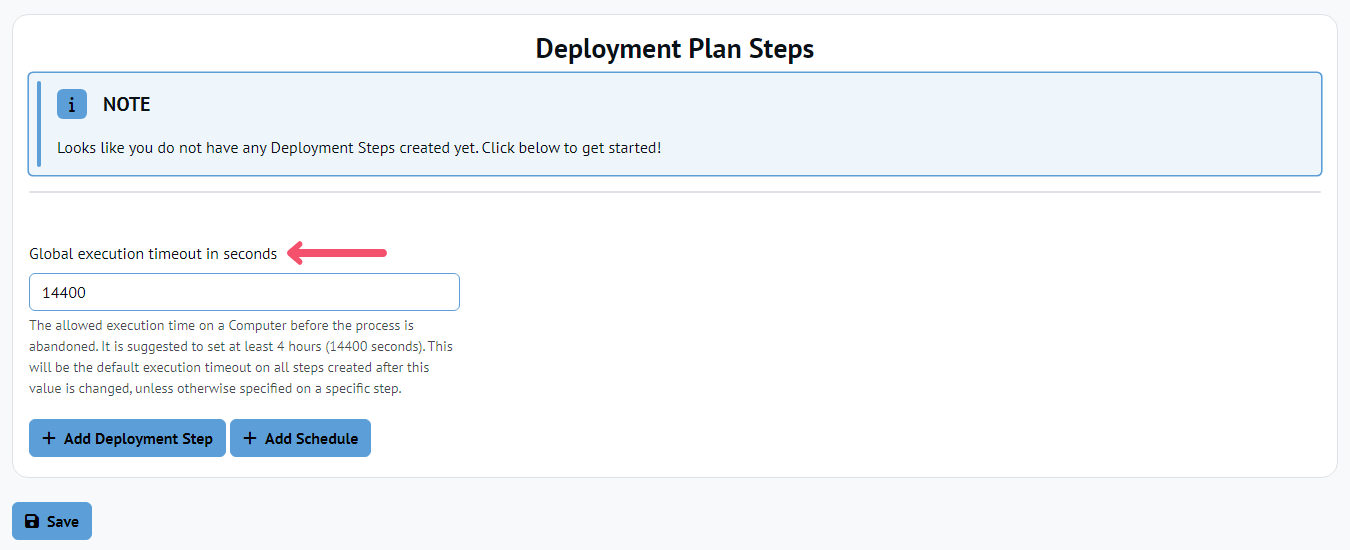
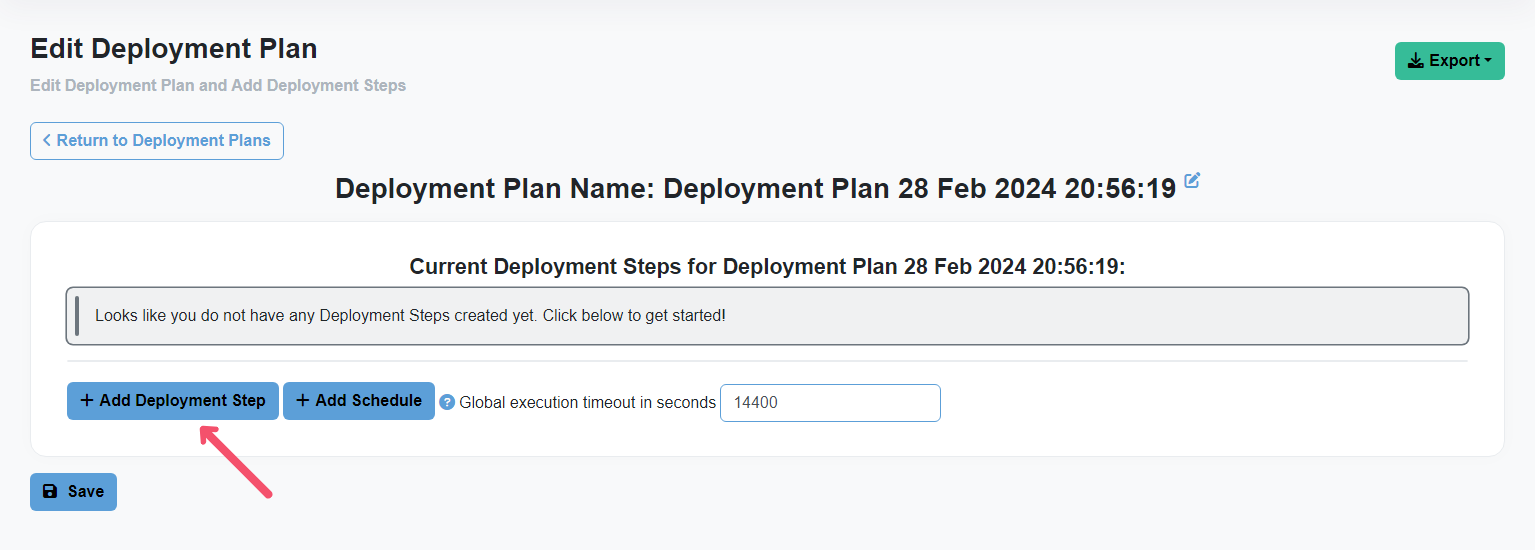
(Optional, Requires Chocolatey Central Management v0.11.0+) Add a Deployment Plan execution timeout in seconds to be used by all Deployment Steps.
-
The Deployment Plan execution timeout in seconds will be used on all steps created after it has been modified. A Deployment Step can override the Deployment Plan execution timeout in seconds by modifying the Deployment Step execution timeout in seconds in the Deployment Step modal located in the advanced filters dropdown.
-
-
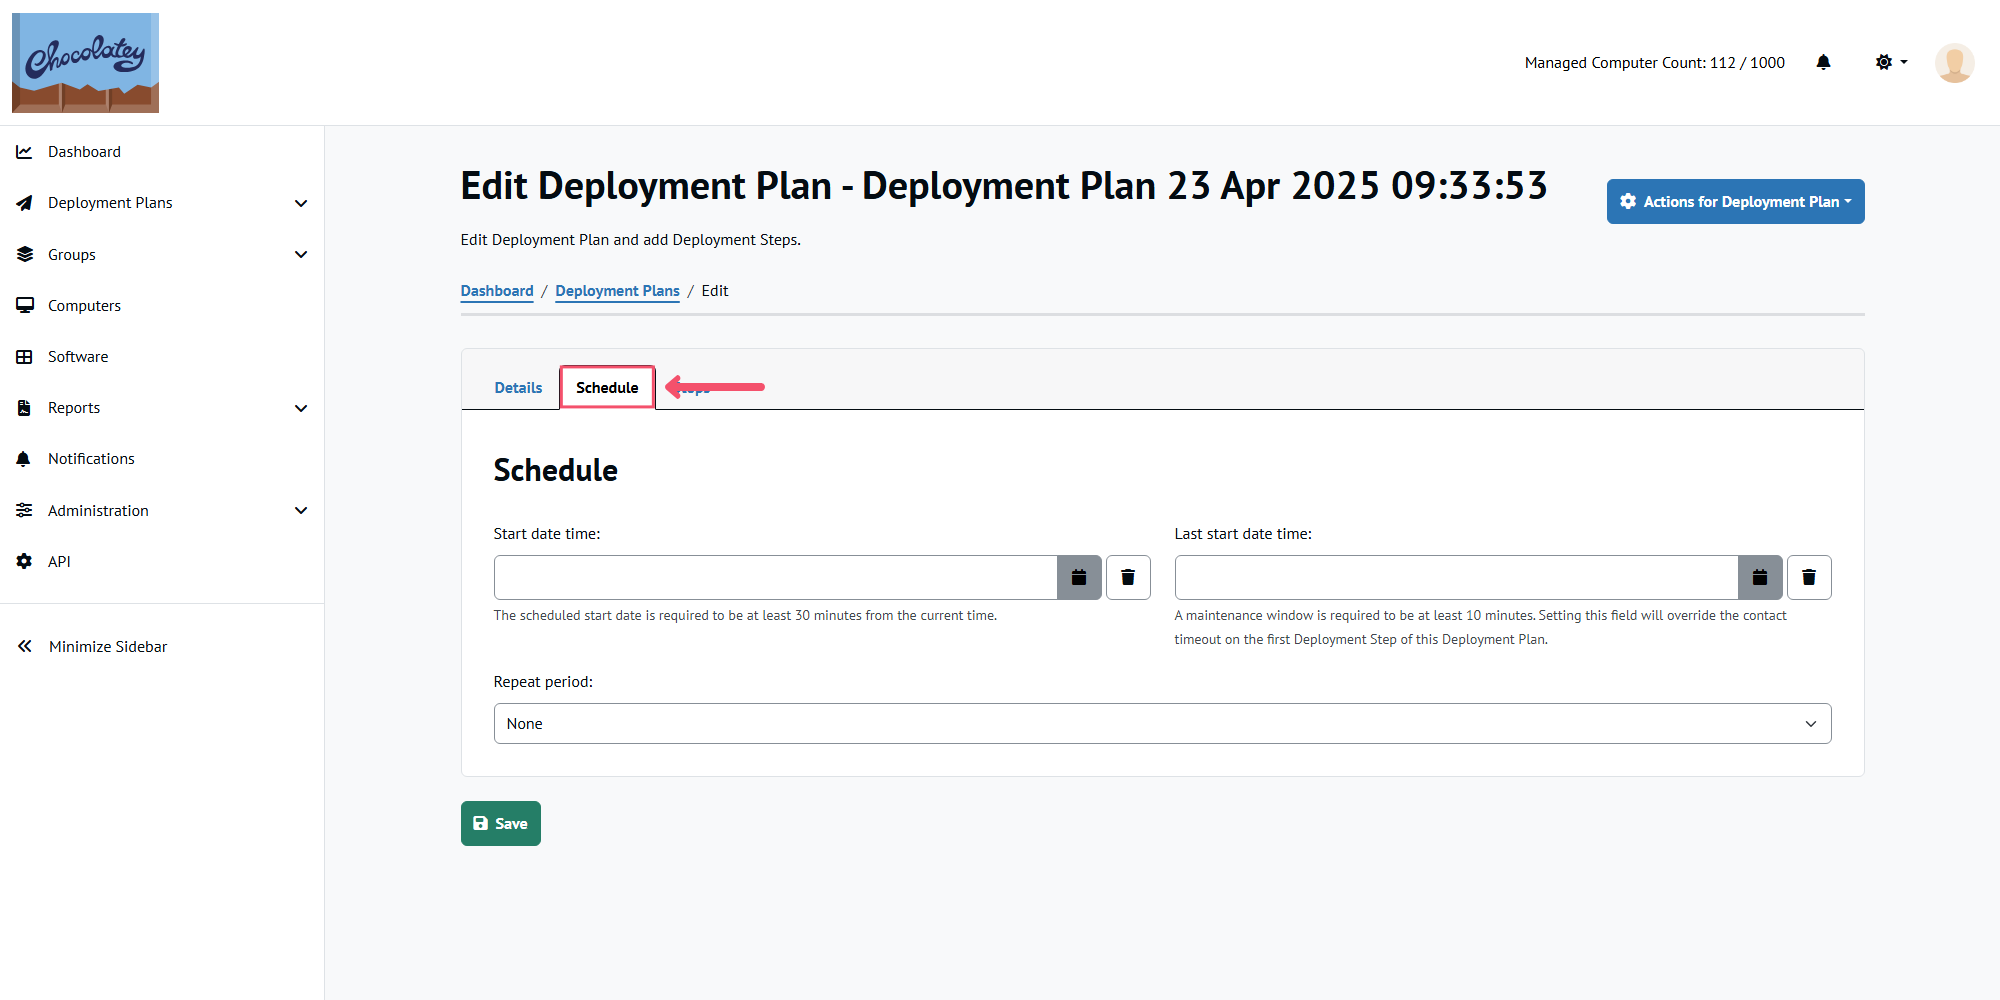
(Optional, Requires Chocolatey Central Management v0.4.0+) Add a schedule by selecting the Schedule tab.
-
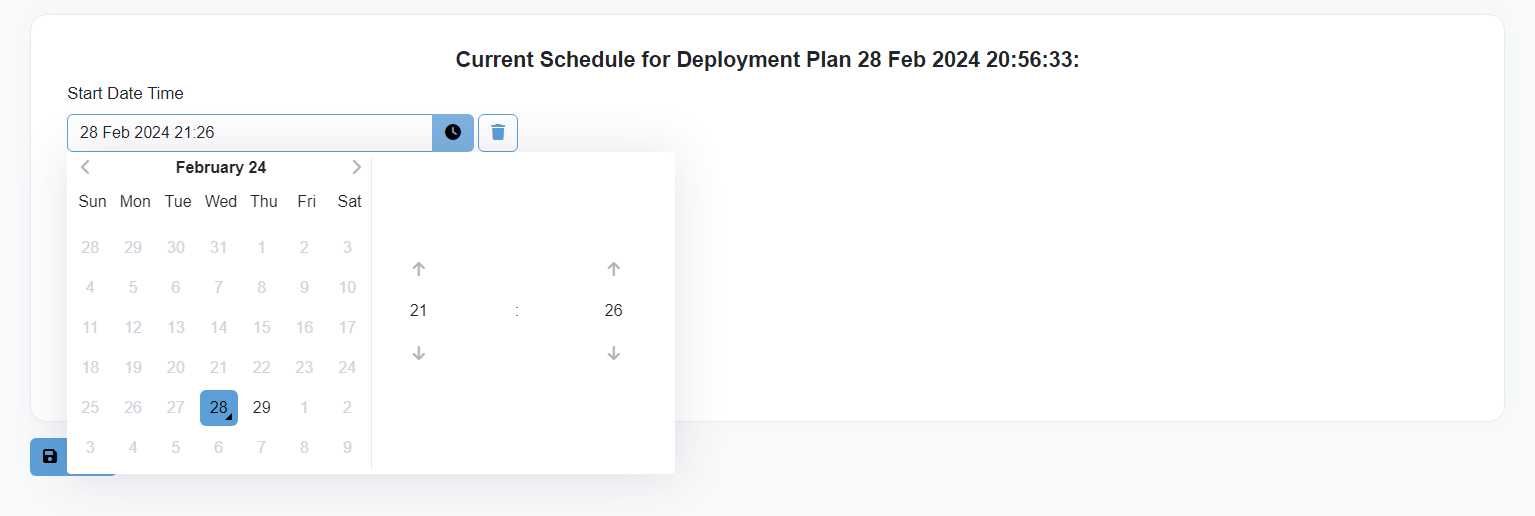
Click the calendar button to pick the Start Date Time from a calendar UI. If you’d like to define an optional maintenance window for the Deployment Plan Start Date Time, then you can also set a Last Start Date Time.
-
(Optional) If you’d like a Deployment Plan to happen again, on a recurring basis, select how often you’d like the Deployment Plan to recur. Check the recurring Deployment Plans section for more information

-
-
Select the Steps tab and click the Add Deployment Step button to add your first Deployment Step.
-
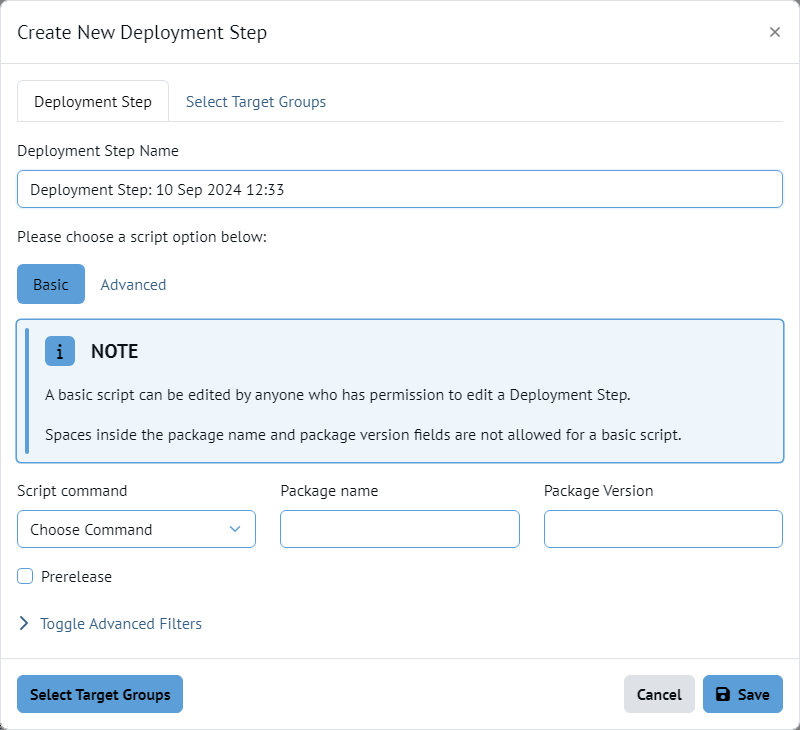
(Optional) In the Create New Deployment Step modal, enter a custom name for the Deployment Step.
-
Add the Deployment Step action:
-
For Basic Deployment Steps, select a
Script commandfrom the list, aPackage nameto install, and optionally a specific package version to install or whether to allow Chocolatey to install the latest prerelease package version. NOTE: It is not possible to use a space character within thePackage nameorPackage Versiontextboxes, and thePackage Versiontextbox must contain at least one digit.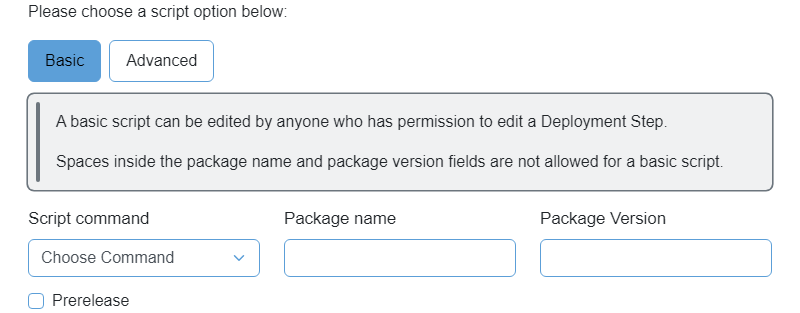
-
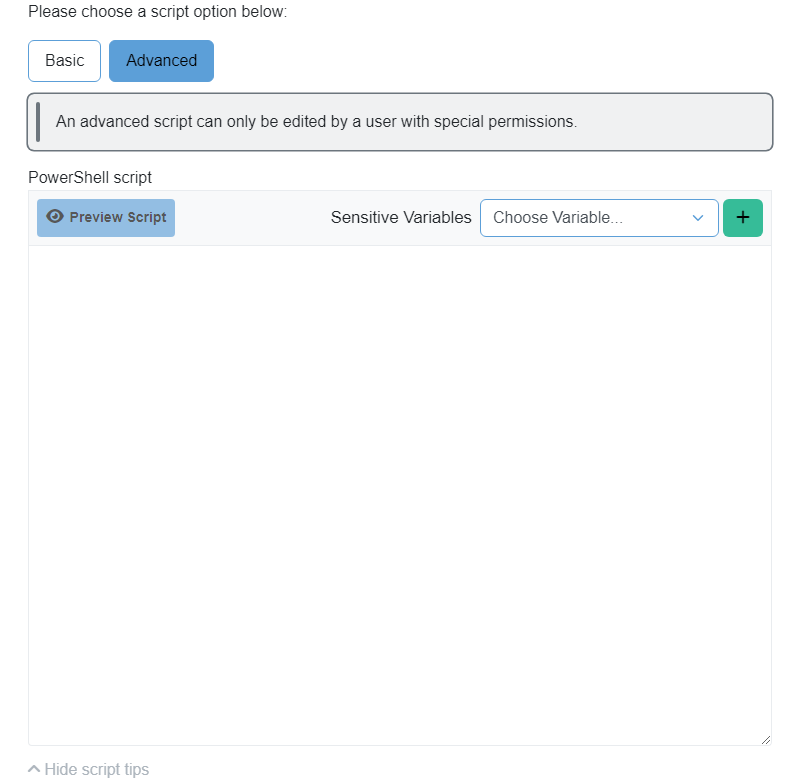
For Advanced Deployment Steps (requires the Create Privileged Deployment user role), click the Advanced button and then enter one or more PowerShell script commands.
-
You can use Sensitive Variables in an Advanced script in Chocolatey Central Management version 0.7.0 and later.
WARNING
To ensure that you don’t accidentally leak sensitive information into Chocolatey logs, be sure to use them with commands or parameters that are hidden from the logs.
-
-
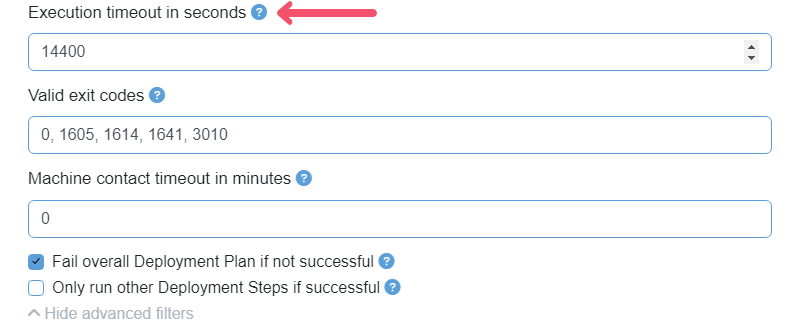
(Optional) Click Toggle advanced filters to set one or more of the following options:
Execution timeout.Valid exit codes.Machine contact timeout(requires Chocolatey Central Management v0.4.0+ to edit).Fail overall Deployment Plan if not successful. Disabling this option will allow the overall Deployment Plan to be marked as successful even if the step fails. By default, if any Deployment Step fails, the overall Deployment Plan is marked as Failed.Only run other Deployment Steps if successful. Enabling this option will prevent subsequent Deployment Steps from starting if this step fails. The overall Deployment Plan will be marked as Failed, and subsequent Deployment Steps will be Cancelled.
-
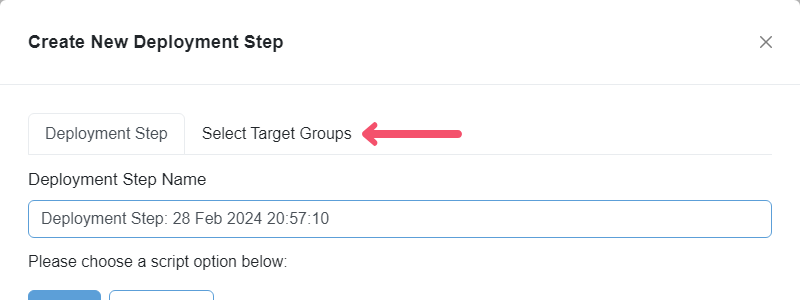
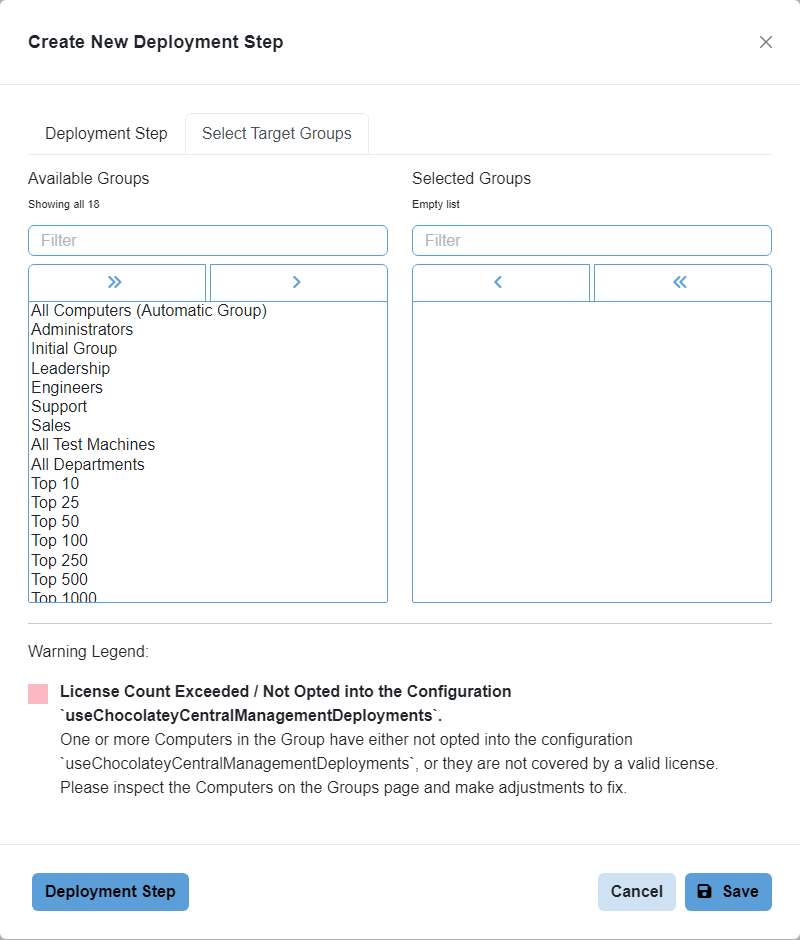
Select the Select Target Groups tab.
-
Select preferred Groups by checking each checkbox in the table. You can also select the top left checkbox in the table head to immediately add all Groups.
-
Click the Save button to save the Deployment Step.

-
Continue to add steps until your Deployment Plan is complete.
-
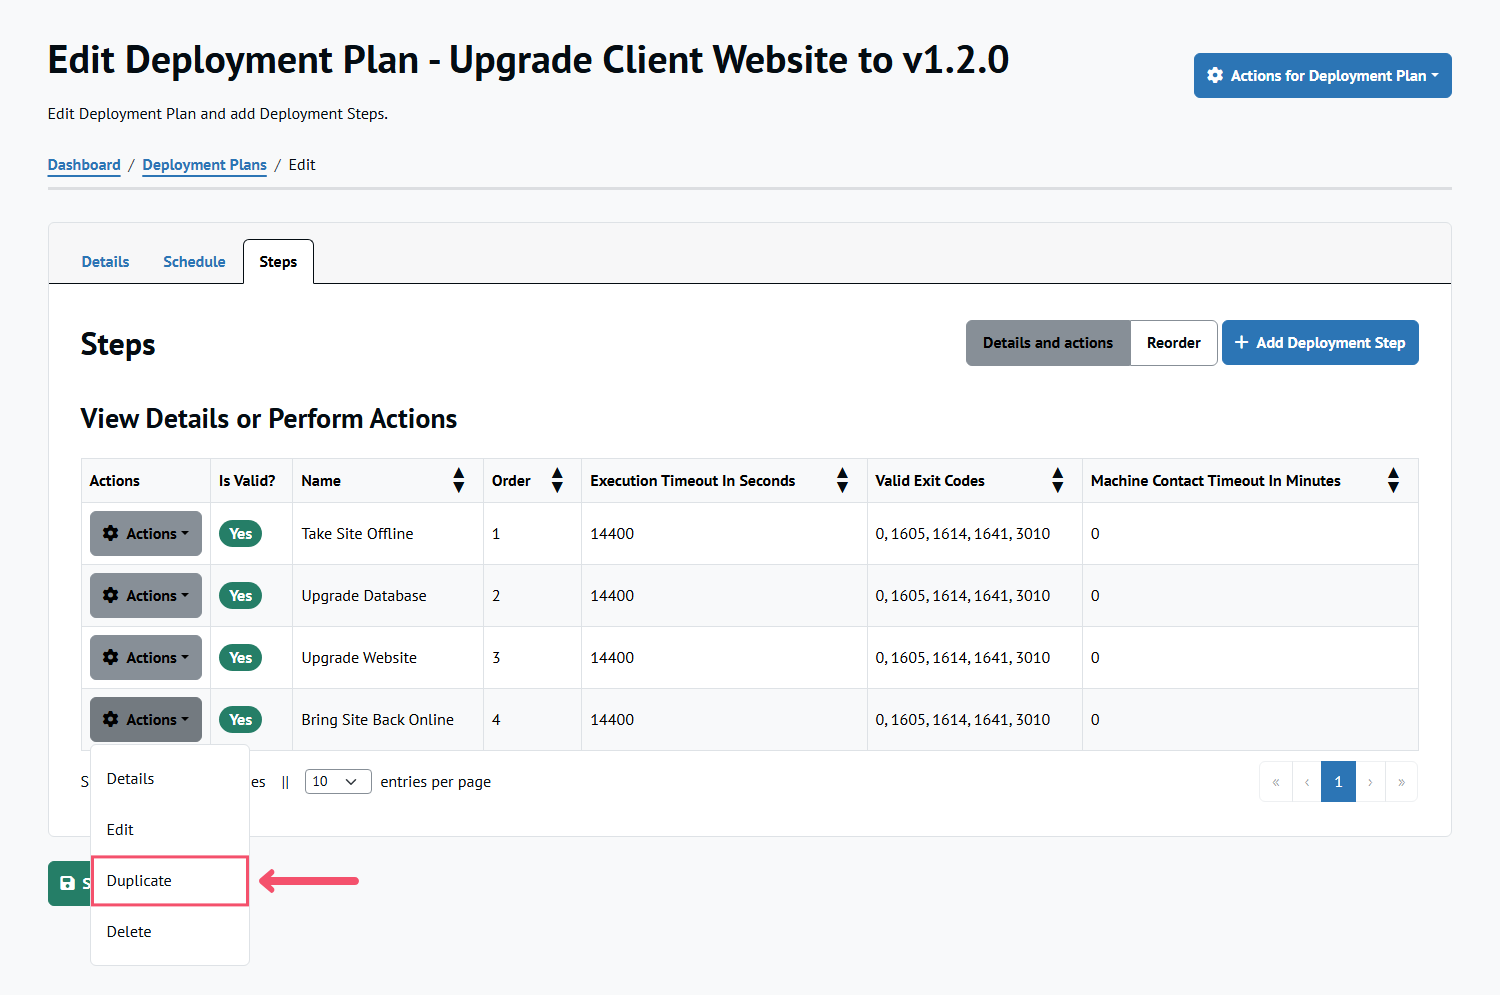
(Optional, requires Chocolatey Central Management v0.12.0) If you need to create multiple similar Deployment Steps, you can use the Duplicate option from an individual Deployment Step’s action button to make a copy of it.
-
Select Save to save the changes to the Deployment Plan.
Importing a Deployment Plan
A Deployment Plan can be imported using a .json file.
-
Prepare your
.jsonfile or export an existing Deployment Plan. -
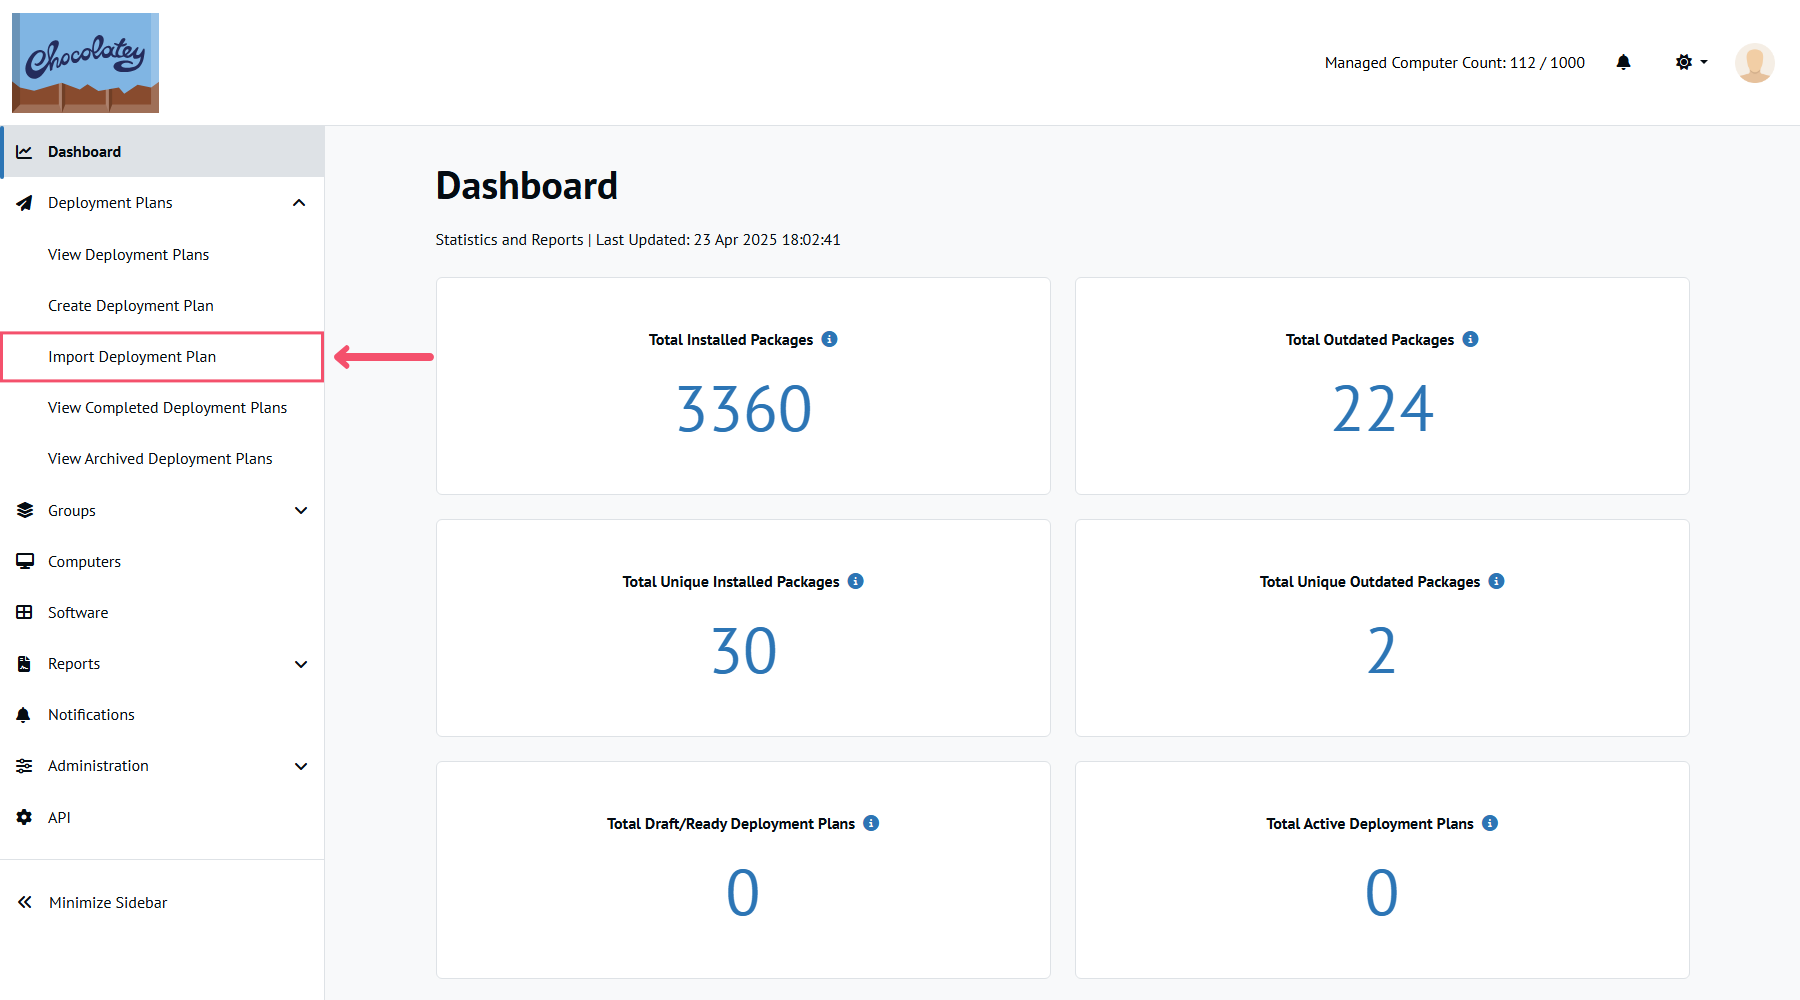
From the Chocolatey Central Management dashboard, select Deployment Plans from the left sidebar and select the Import Deployment Plans option
-
Click the Choose File button to select your
.jsonfile. Review the imported Deployment Plan and then click the Import button.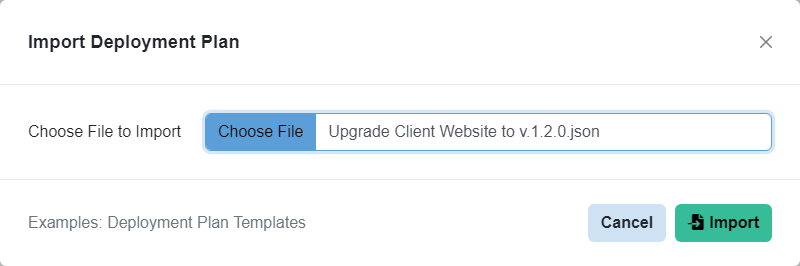
- The Deployment Plan name is shown along with all Deployment Steps after choosing a
.jsonfile. - A yellow badge will appear next to any Deployment Steps that are privileged, along with a warning that gives more information.
- The Deployment Plan name is shown along with all Deployment Steps after choosing a
-
Once the Deployment Plan has been successfully created, you will be taken to the edit page ready to make any additional required changes.
Recurring Deployment Plans
As mentioned above, when creating a Deployment Plan, it is possible to select a scheduled start date/time, and in addition a Repeat Period. This Repeat Period controls how often a Deployment Plan recurs going forward. The values for the Repeat Period are:
DailyWeeklyEvery two weeksEvery four weeksMonthlyEvery two monthsQuarterlyEvery six monthsYearly
Once a Deployment Plan has been assigned a Repeat Period, and it is moved to the Ready state, it will be shown with a slightly different button:
![]()
Let’s take as example a Deployment Plan in the Ready state that is scheduled to start on 23rd August 2022 at 07:11 UTC, with a Repeat Period of Weekly set.
Once this instance of the Deployment Plan moves to the Active state, another instance of the Deployment Plan will be created.
The new instance will have the same steps and settings except for the scheduled start date/time, which will be set to exactly 1 week from the scheduled start date/time of the previous instance (in this case 30th August 2022 at 07:11 UTC).
For repeating Deployment Plans, a new instance of the Deployment Plan will be created once a scheduled Deployment Plan moves to the Active state.
If a repeating Deployment Plan specifies a maintenance window date/time (Last Scheduled Date Time), the new instance’s maintenance window will also be adjusted from the previous instance’s value by the same period as the scheduled start date/time.
WARNING
If the scheduled start date/time of a Deployment Plan is overridden using the Run Now action, the new instance of the recurring Deployment Plan will use the scheduled start date/time of the previous instance when calculating the next scheduled start date/time, not the date/time that the Deployment Plan actually started. If you want to change the scheduled start date/time of the recurring Deployment Plan, edit the Deployment Plan while it is in the Ready state to ensure that future instances of the recurring Deployment Plan will use that value when calculating the next scheduled date/time.
While in the Ready state, if you use the Cancel or Delete action on the recurring Deployment Plan, no further instances of the recurring Deployment Plan will be created.
Deployment Plan States
Draft
A Deployment Plan is initially created in the Draft state, and will remain in this state until it is moved into the Ready state.
While it is in the Draft state, it cannot be run, and scheduled Deployment Plan start times will be ignored.
While in the Draft state, the available actions that can be performed on a Deployment Plan are:
Scheduled/Ready
Once the Deployment Plan enters the Ready state, it’s eligible to be started.
Deployment Plans in this state can be started manually or according to a schedule.
NOTE
Any modifications to a Deployment Plan in this state will revert it back to the
Draftstate.
While in the Ready state, the available actions that can be performed on a Deployment Plan are:
Active
Deployment Plans that are currently in progress will be in this state.
While in the Active state, the available actions that can be performed on a Deployment Plan are:
Completed
Deployment Plans that have completed running will be in either the Success, Failed, Unreachable, Inconclusive, or Cancelled state, depending on how the run went.
While in one of these states, the available actions that can be performed on a Deployment Plan are:
In most cases Deployment Plans in one of the Completed states will remain in that same state.
However, due to changes introduced in Chocolatey Agent v1.1.0, a Deployment Plan in the Inconclusive state due to the computer or the Agent service being shut down or restarted during the Deployment Step, may retry the task and later update the Deployment Plan’s status.
This can result in the Deployment Step or overall Deployment Plan changing from the Inconclusive status to Success or Failed depending on the final status of the retried task.
Archived
Deployment Plans that are in a completed state can be actioned using Archive action to hide them from the main Deployment Plans screen.
This is helpful if you’d like to reduce clutter on the main Deployment Plans screen without discarding the information the completed report contains.
You can access archived Deployment Plans from the Deployment Plans page and clicking on the View Archived Deployment Plans button. Archived Deployment Plans will not appear in any other reports that contain Deployment Plans.
While in the Archived state, no additional actions can be performed on a Deployment Plan.
Deployment Plan Actions
Depending on the state that a Deployment Plan is currently in, there are a defined set of actions that can be performed on them. What follows are is a description of each of those actions.
Move To Ready
This action moves a Deployment Plan from the Draft state to the Ready state. While in this interim state, no additional changes can be made to the Deployment Plan. If changes are made, it will be moved back to the Draft state.
Edit
The action opens the edit page for the selected Deployment Plan. Here changes can be made to the steps, schedule, groups, etc. If any changes are made on the page, a Deployment Plan that was in the Ready state, will be moved back to the Draft state.
Duplicate
NOTE
This feature is available in Chocolatey Central Management starting with version 0.10.0.
The action makes an exact copy (with the exception of any scheduled start/end time or repeat period) of any given Deployment Plan. Once the duplicate has been created, you will be taken to the edit page ready to make any additional required changes. The name of the new Deployment Plan will be the same as the original with some additional information added to the end. For example, if the original Deployment Plan was called Install Papercut, the name given to the duplicate would be Install Papercut - Copy (19 Aug 2022 12:52:25) where the timestamp is the current date time.
NOTE
There is a specific permission to allow duplication of a Deployment Plan. If you want to configure this permission, it can be done either for an individual user, or a specific role
Delete
This removes all information about the Deployment Plan from Chocolatey Central Management.
The action cannot be undone, so care should be taken before using it.
View
The action opens the edit page for the selected Deployment Plan where all the parts of the plan can be viewed. Here changes can be made to the steps, schedule, groups, etc. If any changes are made on the page, a Deployment Plan that was in the Ready state, will be moved back to the Draft state.
Run Now
This action takes a Deployment Plan from the Ready state, to the Active state. This can be thought of as actually setting the Deployment Plan in motion, and the steps within this Deployment Plan will begin to be picked up by the computers that are contained within the steps (in the order that has been defined).
WARNING
If the scheduled start date/time of a Deployment Plan is overridden using the Run Now action, the new instance of the recurring Deployment Plan will use the scheduled start date/time of the previous instance when calculating the next scheduled start date/time, not the date/time that the Deployment Plan actually started. If you want to change the scheduled start date/time of the recurring Deployment Plan, edit the Deployment Plan while it is in the Ready state to ensure that future instances of the recurring Deployment Plan will use that value when calculating the next scheduled date/time.
Cancel
This action stops all future steps from being performed within a Deployment Plan. Any steps that are currently active will still be allowed to complete, but no further steps will occur.
If a recurring Deployment Plan is Cancelled from the Ready state, all future instances of the Deployment Plan are also cancelled.
If you want to skip an iteration of a recurring Deployment Plan, instead change its scheduled start time directly.
Details
This action opens up the details for the selected Deployment Plans, allowing the user to see the progress so far. For example: the currently active Deployment Step, or which computers have picked up this step. This view is useful for monitoring the progress in real time, as the details pages update automatically.
Archive
This action will mark any completed Deployment Plan as archived, and it will no longer be shown in the main Deployment Plans screen of Chocolatey Central Management website. You can access archived Deployment Plans from the Deployment Plans page and clicking on the View Archived Deployment Plans button.
Export
This action will export the details of the Deployment Plan to a .json file. The name of the new Deployment Plan will be the same as the original with some additional information added to the end. For example, if the original Deployment Plan was called Install Papercut, the name given to the exported Deployment Plan would be Install Papercut - Exported (19 Sept 2023 12:52:25) where the timestamp is the current date time.
Deployment Plan Status Notifications
NOTE
Email notifications require that the Email / SMTP settings have been configured first. If these settings have not been configured, email notifications will not be sent.
Deployment Plan Completion Notifications
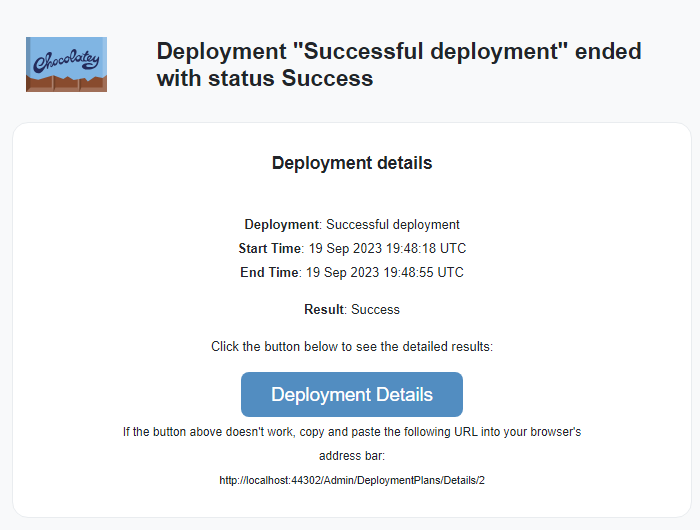
As of Chocolatey Central Management v0.11.0, all Deployment Plans will issue an email notification when they finish to the user that created the Deployment Plan. The email notification will indicate the status of the Deployment Plan, as well as linking back to the Deployment Plan details page for further information.
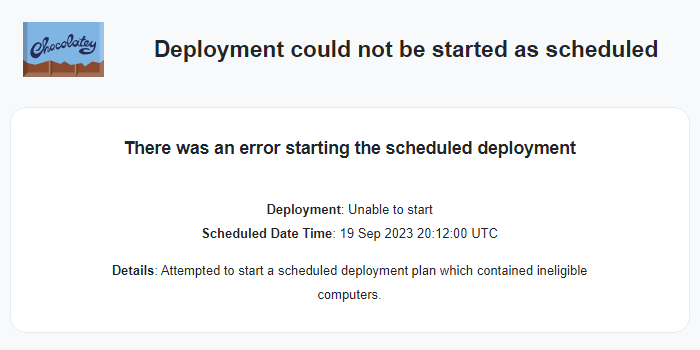
Notification for Scheduled Deployment Plans Unable to Start
As of Chocolatey Central Management v0.10.0, a scheduled Deployment Plan that fails to start will issue a push notification as well as an email notification to the user who initially created the Deployment Plan. The push notification can be viewed in Chocolatey Central Management by clicking the “bell” icon in the top navigation.
FAQ
What Versions of Components Do I Need for Deployments to Work Properly?
While you might be able to get things to work with Chocolatey Central Management v0.2.x and Chocolatey Agent v0.10.x, it’s best to use the following:
- Chocolatey Central Management components (
chocolatey-management-*all 3 packages) - v0.3.0+ - Chocolatey Agent (
chocolatey-agentpackage on all clients) - v0.11.0+ - Chocolatey Licensed Extension (
chocolatey.extensionon all clients) - v2.1.1+
What Is the Chocolatey Central Management Compatibility Matrix?
Chocolatey Central Management has specific compatibility requirements with quite a few moving parts. It is important to understand that there are some Chocolatey Agent versions that may not be able to communicate with some versions of Chocolatey Central Management and vice versa. Please see the Chocolatey Central Management Component Compatibility Matrix for details.
Why Do I See Some Machines Have Not Opted in for Deployments?
If you are on the Groups screen, you may notice that some machines show up highlighted with a color. The legend below it mentions “Not Opted In For Deployments (Configuration)”.
As you can see from the text, it is meant to help you figure out the issue:
The Computer has not opted in, or a Group contains computers that have not opted in for Deployments by configuration. Please ensure the computer has at least chocolatey-agent v0.10.0+ installed and the feature “useChocolateyCentralManagementDeployments” has been set to enabled on the client computer.
This is telling you that you need to ensure you set the client to allow for the use of Deployments. As it is a security consideration, it requires an explicit opt-in on client machines. See Client Setup - Features for details on how to set it.
I Have Plenty of Licenses, Why Do Some Machines Show Not Opted in for Deployments and Also Exceeds Your Current License Count?
Once you upgrade to at least Chocolatey Central Management v0.2.0, every machine will show that until they check in the next time. Once they check in, that will go away. So it’s basically normal to see that until those machines check in again.
Can I use Chocolatey Deployment Plans to upgrade Chocolatey Central Management based components?
You can upgrade the chocolatey-agent package via Chocolatey Central Management. To do so please see here as this must be performed as an advanced Deployment Step.
We do not recommend upgrading Chocolatey Central Management itself via an automated Deployment Plan process. Please see our Chocolatey Central Management Upgrade Documentation for the supported upgrade process.
What is Run Actual?
You may have seen --run-actual get attached to scripts where you are running choco commands - what is it?
This is a switch that is passed to opt out of Chocolatey Self-Service. It’s typically passed by the agent service back to choco to run a command for a user. You typically would not issue this, but the agent service will, so you are likely to see it in the logs if you are looking closely.
What Happens if More Than One Deployment Plan is “Active” at the Same Time?
This will depend a little bit on the version of Chocolatey Central Management you’re running. Prior to v0.4.0, control of Deployment Plans was handled entirely on a per-Deployment-step basis. This means that if you have an active Deployment Plan with some of the Computers in it idling (waiting for a later step in the Deployment Plan to begin, essentially), these machines will pick up available Deployment Steps from an unrelated Deployment Plan while they’re waiting.
As of v0.4.0 of Chocolatey Central Management, this has been fine-tuned a little bit so that any Computer which is acted on by a Deployment Step will not pick up any further Deployment Steps from unrelated Deployment Plans until all its assigned steps in the first Deployment Plan are completed.
This can get a bit confusing, so let’s consider the following scenario:
- Deployment Plan A
- Deployment Step 1
- Computer A
- Computer B
- Deployment Step 2
- Computer B
- Deployment Step 3
- Computer A
- Deployment Step 1
- Deployment Plan B
- Deployment Step 1
- Computer A
- Deployment Step 1
Let’s say Deployment Plan A is started first, and Deployment Plan B starts while Deployment Plan A is in either Deployment Step 1 or Deployment Step 2.
When Deployment Plan A reaches Deployment Step 2, even though Computer A is not currently running any Deployment Steps, it will not start running steps from Deployment Plan B because it still has a task to do in Deployment Plan A.
If you are running Chocolatey Central Management 0.3.x, Computer A will instead pick up and run the step from Deployment Plan B despite Deployment Plan A still being in progress.
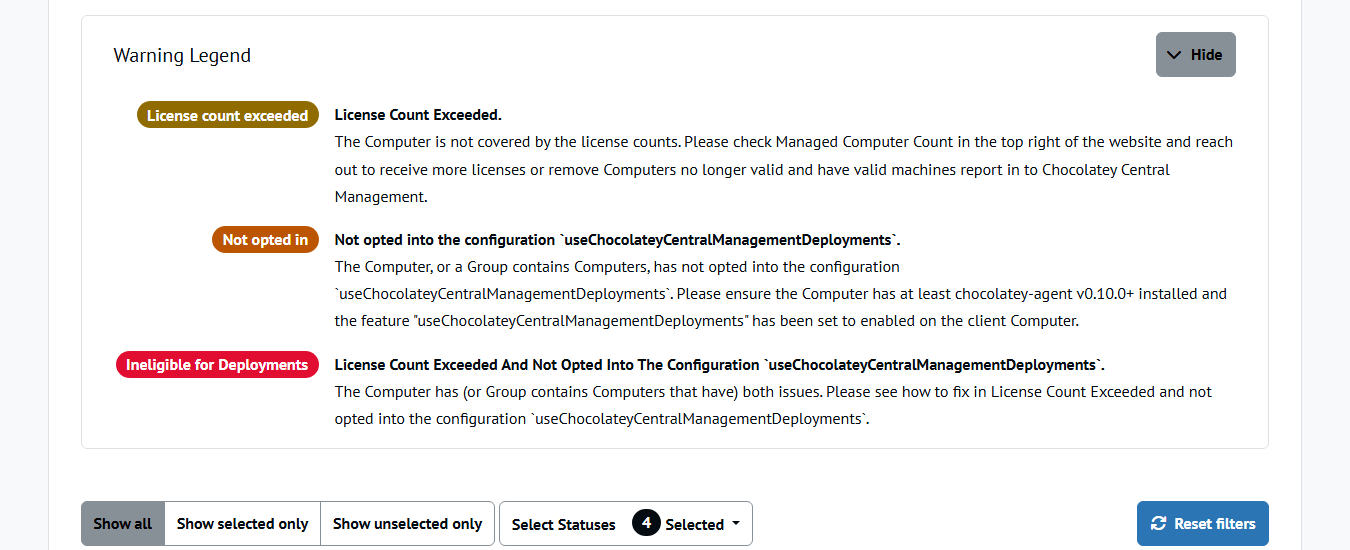
Why do My Computers or Groups Show as Ineligible for Deployments While They’re Opted In?
Computers can be considered ineligible for Deployments based on two criteria:
- Is the computer licensed under your Chocolatey for Business license?
- Is the computer opted in for Deployments based on the Chocolatey configuration?
If either one of these two criteria is not met, that Computer is considered ineligible for Deployments.
Additionally, any group that contains any of the following will be considered ineligible:
- An ineligible Computer
- A Group containing any ineligible Computers
- A Group containing any ineligible Groups
What Happens if a Computer / Group in a Deployment Becomes Ineligible?
-
For Deployment Plans that have not yet started:
- If the Deployment Plan is scheduled, it will not run until all Computers/Groups are eligible again.
- If the Deployment Plan is not scheduled, it cannot be started until all Computers/Groups are eligible again.
Once Chocolatey Central Management has confirmed the problem Computer(s)/Group(s) are eligible again, the Deployment Plan can be started. If the Deployment Plan was previously scheduled, and it has not passed the maintenance window time (if set), it will start at that point.
-
For Deployment Plans that are currently
Active- As soon as Chocolatey Central Management detects the ineligible Computer, it will terminate the current Deployment Step.
- Then, all following Deployment Steps will be
Cancelled.
How Can I Run Deployment Plans in a Semi-Connected Environment?
As of Chocolatey Central Management v0.4.0, you are able to configure Deployment Plans to tolerate semi-connected environments. This effectively allows Chocolatey Central Management Deployments to simply wait until a machine is connected to the network before it begins a given Deployment Step.
To configure this, you can set the Machine Contact Timeout value in the Advanced settings of each individual Deployment Step to 0.
This value must be positive, or zero (which is treated as infinite).
You may want to configure this only for the first step of a Deployment Plan, or for multiple steps if you expect the target machines to be connected/disconnected over the course of the Deployment Plan.
NOTE
If the Deployment Plan is scheduled with a maintenance window set, the
Machine Contact Timeoutvalue of the first Deployment Step is ignored. In this case, the maintenance window defines the contact timeout for the first step. TheExecution Timeoutis the maximum allowed time for the Chocolatey Agent to execute the Deployment Step task. Any positive value for this setting will be respected, and as withMachine Contact Timeout, a0value is treated as infinite. However, if the execution timeout is infinite and a computer goes offline, that Deployment Step will not complete until that computer checks in again. If it errors three times attempting to provide the results, it will fail it at the client and that computer will not report results, and require manual intervention. Infinite execution timeouts are not recommended for this reason — Deployment Steps may end up seemingly stalling for long periods of time and/or require manual intervention to cancel them.
Deployment Plans Webinars
Catch the recording of the Jun 23rd, 2020 webinar for a full showcase of the Chocolatey Central Management Deployments features:
https://chocolatey.org/events/chocolatey-deployments
Common Errors and Resolutions
A Deployment Step Is Stalled With Infinite Execution Timeout
The only way to resolve this currently is to cancel the Deployment Plan itself, which can be done from the main Deployment Plans list.
On the left-hand side of the Active Deployment Plans table, click the Actions menu for the corresponding Deployment Plan, and select Cancel.
You will be asked to confirm the cancellation.
All remaining steps in the Deployment Plan will be cancelled, along with any still running or pending tasks.
The Updated License File Is Not Being Picked Up in the Website
You need to restart the web executable currently. We are looking to have it automatically picked up in future releases. Here’s a script to handle that:
Get-Service chocolatey-* | Stop-Service
Get-Process -Name "ChocolateySoftware.ChocolateyManagement.Web.Mvc" -ErrorAction SilentlyContinue | Stop-Process
Get-Service chocolatey-* | Start-Service
A Computer or Group Is Not Showing as Available for Deployment Plans but I Have Plenty of Available Licenses
Once you upgrade to Chocolatey Central Management v0.3.0+, you have upgraded the Agent on the machine to v0.11.0+, and it has successfully completed a check in, then that messaging should go away. Note that clients do not get a message back that there was a failure as a security feature - you’ll need to consult the Chocolatey Central Management Service logs. You can find that at $env:ChocolateyInstall\logs\ccm-service.log, or if you are on a version of Chocolatey Central Management prior to 0.2.0, the log will be located at $env:ChocolateyInstall\lib\chocolatey-management-service\tools\service\logs\chocolatey.service.host.log.
Using choco Commands in a Script Deployment Plan Break if Semicolons Are Used to Separate the Statements
When constructing a PowerShell script for a Deployment Step, all Chocolatey commands must be placed on separate lines. It is not possible to do something like the following:
choco list -r; exit $LASTEXITCODE
Instead, this should be written as:
choco list -r
exit $LASTEXITCODE
choco list --local-only -r; exit $LASTEXITCODE
Instead, this should be written as:
choco list --local-only -r
exit $LASTEXITCODE
For more information on when this will be addressed, you can subscribe to the GitHub issue.