RDP Access
RDP Access
Summary
After deploying a Chocolatey for Business Azure Environment, you may wish to link the machine to an existing Active Directory domain or install monitoring software. This page will show you how to gain access to the primary VM within the environment via Remote Desktop Protocol (RDP).
We will assume you know how to retrieve passwords from your environment. In order to connect, you need the VM username and password (stored in the deployed Azure Key Vault).
Azure Portal
We need to add a publicly accessible IP address to the VM, and add a rule to the Network Security Group (NSG) to allow connections.
First we will add the IP address:
-
In the Azure Portal, navigate to the Resource Group containing your deployed Chocolatey for Business Azure Environment.
-
Select the VM’s network interface (which should be called
choco-vm-nicby default), and open theIP configurationspanel.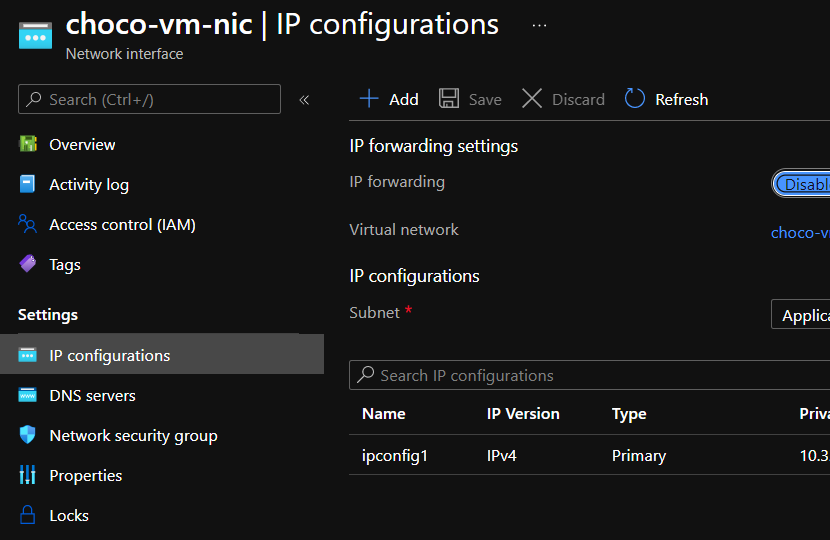
-
Select the IP configuration (
ipconfig1by default), and underPublic IP address settingsclickAssociate.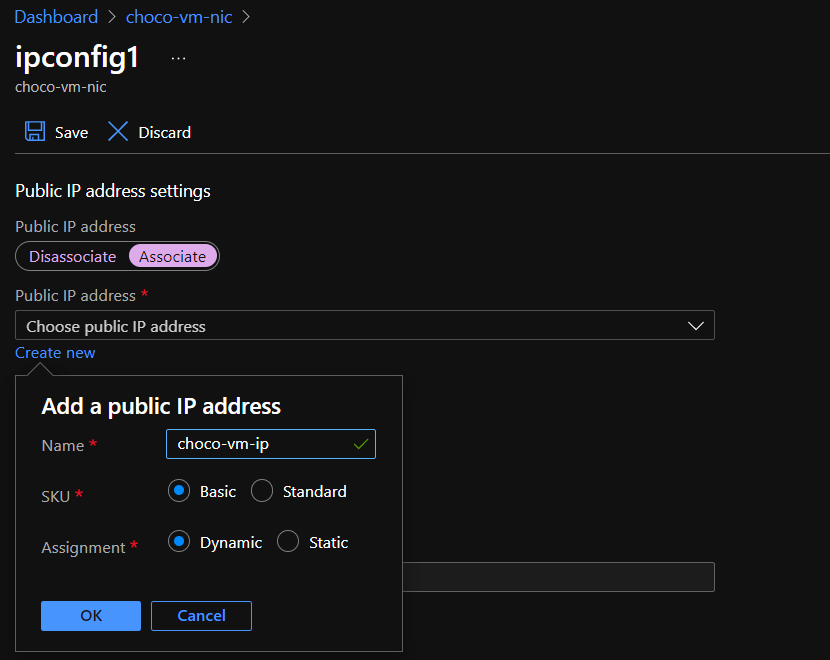
-
Click
Create new, and create a basic IP address. For future examples, I have named this IPchoco-vm-ip.Key Value Name choco-vm-ip (or similar) Sku Basic Assignment Dynamic -
Click
Save.
On returning to the network interface overview, a Public IP address should now be visible. Make a note of the value.
Now we will add a rule to the NSG. If you do not already know your current public IP address, you can find out by visiting ipconfig.me.
-
Navigate back to your Resource Group in the Azure Portal
-
Select the
Network security group, and open theInbound security rulespanel.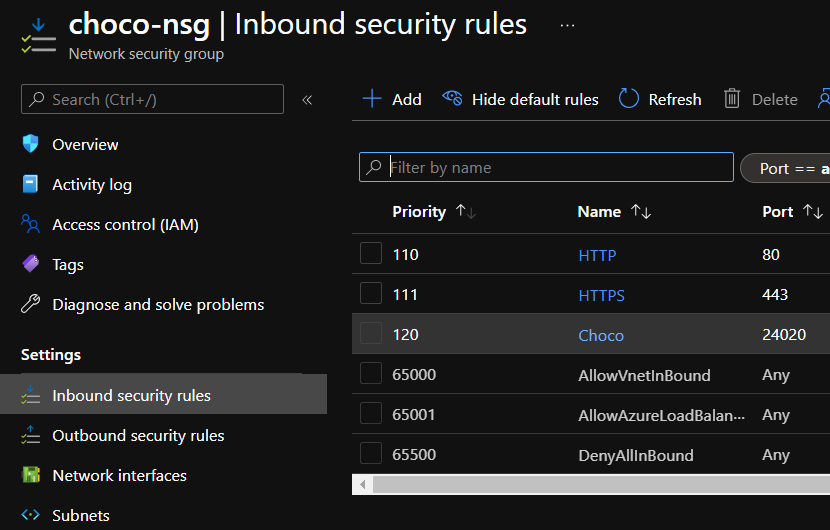
-
Click
Addand fill in at least the following details:Key Value Service RDP Source IP Addresses Source IP addresses Your current public IP address Name RDPAccess (or similar) -
Click
Addat the bottom of the panel
You should now be able to try Connecting to the VM
PowerShell
For the sake of this section, we will assume that you have installed an up-to-date version of Az modules and your session is authenticated with an account that has access to your Chocolatey for Business Azure Environment. We also assume that you haven’t made significant modifications to the deployed resources.
To begin, we need to create a Public IP address for the VM.
if (-not $ResourceGroupName) {
    $ResourceGroupName = Read-Host 'Enter the ResourceGroupName'
}

# There should only be one network interface in the resource group.
if (-not ($NI = Get-AzNetworkInterface -ResourceGroupName $ResourceGroupName -Name *-nic)) {
    Write-Error "No Network Interface matching '*-nic' found in '$($ResourceGroupName)'. Please ensure deployment is complete."
}

if (-not $NI.IpConfigurations[0].PublicIpAddress.Id) {
    # If there is no public IP address assigned, we create one.
    if (-not ($VMPublicIp = Get-AzPublicIpAddress -ResourceGroupName $ResourceGroupName -Name 'TempIP')) {
        $ResourceGroup = Get-AzResourceGroup -Name $ResourceGroupName
        $VMPublicIp = New-AzPublicIpAddress -ResourceGroupName $ResourceGroupName -Name 'TempIP' -Location $ResourceGroup.Location -AllocationMethod Dynamic
    }

    # And assign it to the VM's network interface
    $NI.IpConfigurations[0].PublicIpAddress = $VMPublicIp
    $NI = Set-AzNetworkInterface -NetworkInterface $NI
}
We should then create a NSG rule to allow traffic from our current IP to the VM over the port used for RDP (3389). If you want to create the rule for another IP address, you should change the value of $IPAddress before running the Add and Set commands.
if (-not $ResourceGroupName) {
    $ResourceGroupName = Read-Host 'Enter the ResourceGroupName'
}
# Look up your current Public IP address
$IPAddress = (Invoke-WebRequest -Uri "https://ifconfig.me/ip").Content

# Find the deployed Network Security Group
$Group = Get-AzNetworkSecurityGroup -ResourceGroupName $ResourceGroupName

# And add a rule allowing RDP from your current Public IP address
$RdpRule = @{
    Name                     = "$($env:UserName)-RDP"
    Direction                = 'Inbound'
    Priority                 = (($Group.SecurityRules.Priority | Sort-Object)[0] - 1)
    Access                   = 'Allow'
    SourceAddressPrefix      = $IPAddress
    SourcePortRange          = '*'
    DestinationAddressPrefix = '*'
    DestinationPortRange     = '3389'
    Protocol                 = 'TCP'
}
$null = Add-AzNetworkSecurityRuleConfig @RdpRule -NetworkSecurityGroup $Group
$null = Set-AzNetworkSecurityGroup -NetworkSecurityGroup $Group
Finally, you can find the IP address to connect to by running the following code:
if (-not $ResourceGroupName) {
    $ResourceGroupName = Read-Host 'Enter the ResourceGroupName'
}
# Look up the new Public IP address for the VM's network interface
$NI = Get-AzNetworkInterface -ResourceGroupName $ResourceGroupName -Name *-nic
$IPAddress = Get-AzPublicIpAddress -ResourceGroupName $ResourceGroupName -Name $NI.IpConfigurations.PublicIpAddress.Id.Split('/')[-1].IPAddress

Write-Host "The IP Address to connect to is $($IPAddress)"
Connecting to the VM
NOTE
It can sometimes take a few minutes for the Network Security Group rules to be updated.
Finally, use the IP address that we found in the previous steps to connect to the VM](https://docs.microsoft.com/en-us/azure/virtual-machines/windows/connect-logon) using the IP address you procured in the previous steps, using [the credential from the Azure Key Vault.