Certificate Update
Certificate Update
Summary
When deploying a Chocolatey for Business (C4B) Azure Environment, you are asked to supply an SSL certificate. This page shows you how to update that certificate when the original is expiring or has been regenerated for any other reason.
To perform this operation you will need to have permissions sufficient to edit Access Policies on the environment’s Azure Key Vault.
Please note that it can take some time for all of the components in your C4B Azure Environment to reflect the new certificate.
For portions of this document using PowerShell, we assume you have installed a recent version of the Az modules (easily available by running choco install az.powershell in an elevated prompt), and have logged in to your account using Connect-AzAccount. You can also set a variable, $ResourceGroupName, to the name of the resource group you deployed the Chocolatey for Business Azure Environment to as we will use this with the PowerShell code snippets below.
Access Policies
Similar to the Access Policies configuration needed to access the usernames and passwords for the services running in your C4B Azure Environment, you will need to configure access to manage the SSL certificate.
You can adjust the Access Policies using the Azure Portal or PowerShell.
Azure Portal
-
Navigate to the
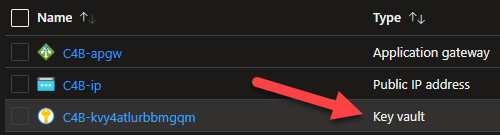
Resource Groupthat contains your C4B Azure Environment. -
Select the Key vault.
-
Under
Settingson the left of the blade, selectAccess Policies. -
Click
+ Add Access Policy.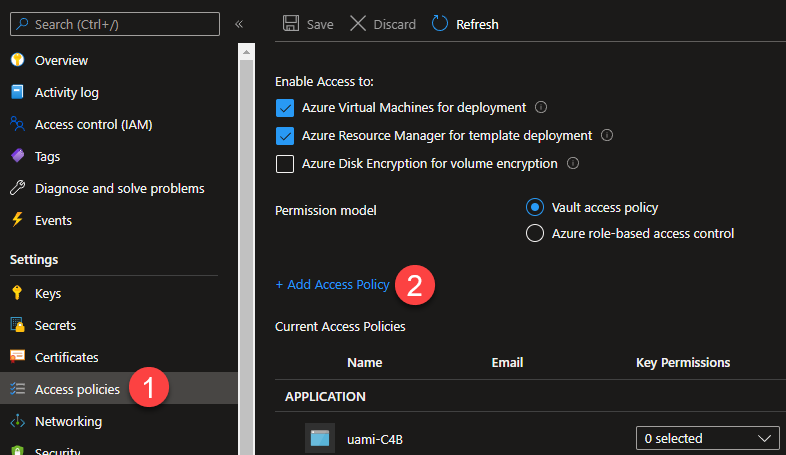
-
Select, at a minimum,
Certificate Permissions:Get,List,Import, andUpdate(You can use a Template such asCertificate Management).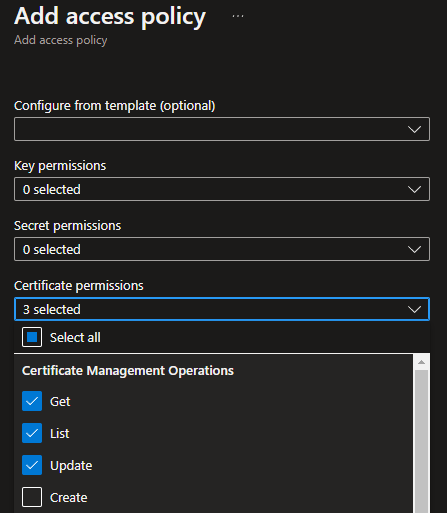
-
Under
Select Principal, clickNone Selectedand find your current user, and select it. -
Click
Add.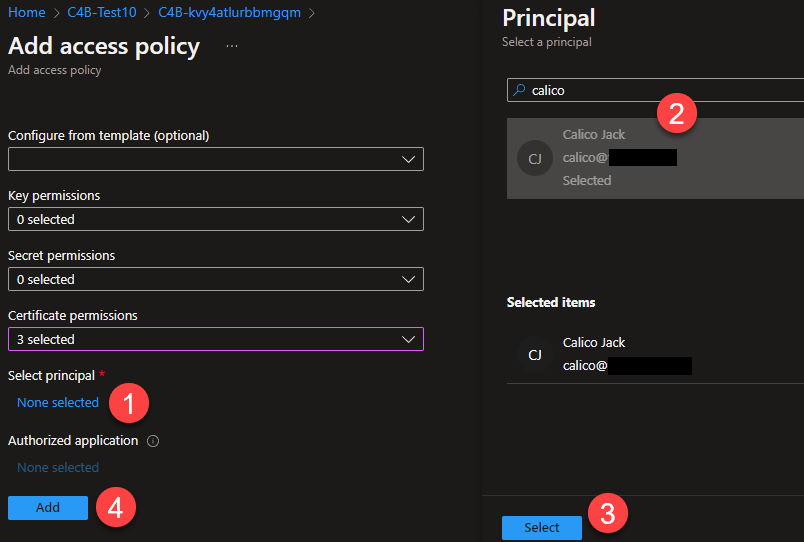
-
Back on the
Access Policiesblade, hitSaveand wait for the operation to complete.
PowerShell
if (-not $ResourceGroupName) {$ResourceGroupName = Read-Host 'Enter the ResourceGroupName'}
$CurrentUser = (Get-AzContext).Account.Id

# Grant access to the KeyVault, if missing
$KeyVault = Get-AzKeyVault -ResourceGroupName $ResourceGroupName | ForEach-Object {Get-AzKeyVault -VaultName $_.VaultName}
$CertPermissions = $KeyVault.AccessPolicies.Where{$_.DisplayName -like "*$CurrentUser*"}.PermissionsToCertificates
if ($CertPermissions -notcontains 'Get' -or $CertPermissions -notcontains 'List' -or $CertPermissions -notcontains 'Update' -or $CertPermissions -notcontains 'Import') {
    $NewCertPermissions = $CertPermissions + @('Get', 'List', 'Update', 'Import') | Select-Object -Unique
    Set-AzKeyVaultAccessPolicy -VaultName $KeyVault.VaultName -UserPrincipalName $CurrentUser -PermissionsToCertificates $NewCertPermissions
}
Updating the Azure Key Vault
The certificate used by most of the C4B Azure Environment is stored in the provided Azure Key Vault under the name C4B-Azure-Certificate. To update the certificate used by the environment, you create a new version of this certificate.
NOTE
Please note that the new certificate must meet the same requirements as the original did during the initial deployment. The certificate:
- Needs to be in the PFX format.
- Needs to include an exportable Private Key.
- Must have a password.
You can upload a new version of the certificate using the Azure Portal or PowerShell.
Azure Portal
-
Within the Key Vault, under
Settingson the left of the blade, selectCertificates. -
Select the certificate named
C4B-Azure-Certificate.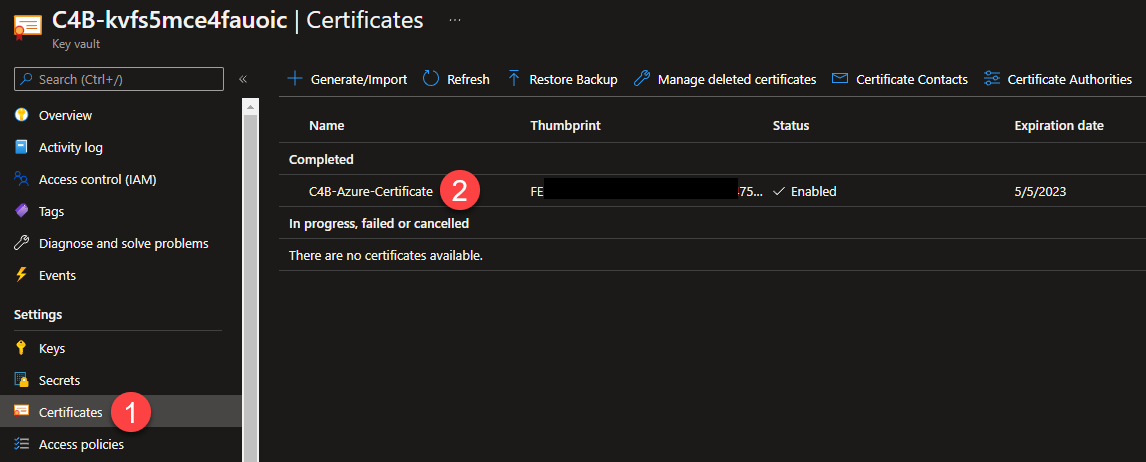
-
Click
+ New Version.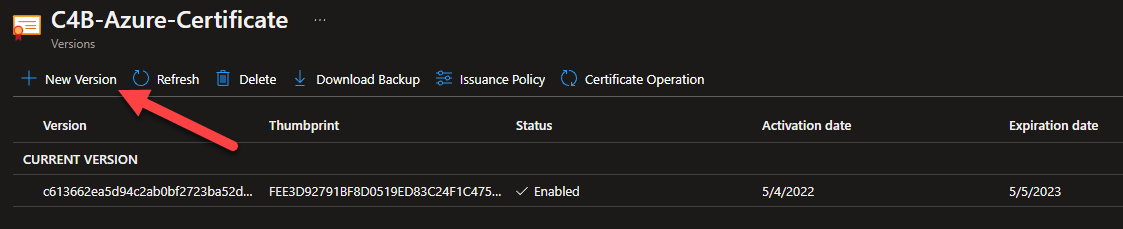
-
Change the
Method of Certificate CreationtoImport. -
Upload your certificate PFX file, and provide the password needed to import it.
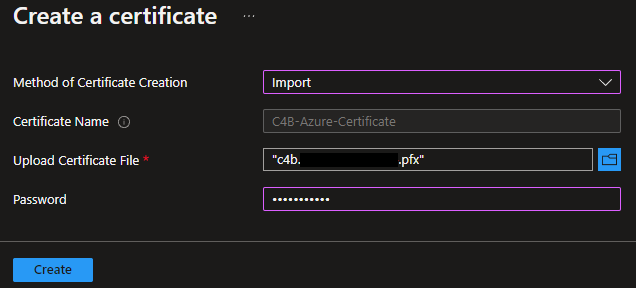
-
Click
Create. -
The new certificate will now be listed as the
CURRENT VERSIONand any previous certificates will be listed underOLDER VERSIONS.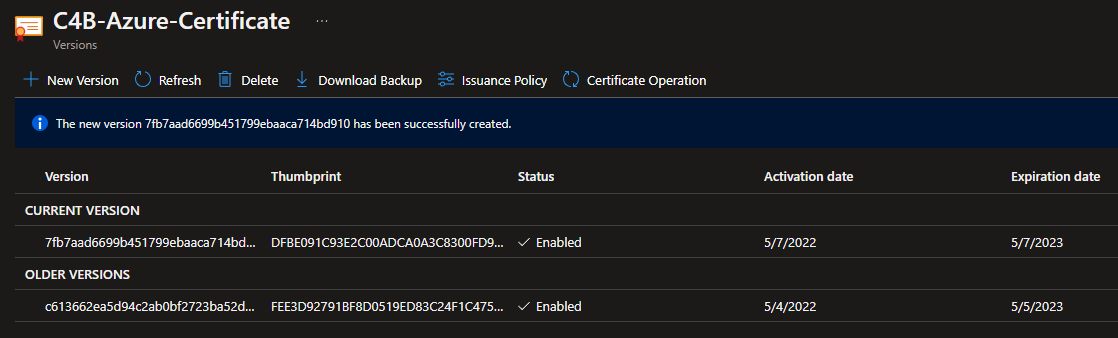
PowerShell
This script prompts you for the name of the Resource Group that contains your C4B Azure Environment and then opens a dialog box to select your new certificate.
if (-not $ResourceGroupName) {$ResourceGroupName = Read-Host 'Enter the ResourceGroupName'}
$KeyVault = Get-AzKeyVault -ResourceGroupName $ResourceGroupName | ForEach-Object {Get-AzKeyVault -VaultName $_.VaultName}

$null = [System.Reflection.Assembly]::LoadWithPartialName("System.Windows.Forms")
$FileBrowser = New-Object System.Windows.Forms.OpenFileDialog -Property @{
    Title  = 'Select Chocolatey for Business Azure Environment Certificate'
    Filter = 'Certificate (*.pfx)|*.pfx'
}
$null = $FileBrowser.ShowDialog()

$CertImport = @{
    VaultName = $KeyVault.VaultName
    Name      = 'C4B-Azure-Certificate'
    FilePath  = $FileBrowser.FileName
}
$null = Import-AzKeyVaultCertificate @CertImport -Password (Read-Host "Enter the certificate import password" -AsSecureString)
Updating the Application Gateway
The Application Gateway provided with your C4B Azure Environment needs to be updated manually, as it is not able to reference the Azure Key Vault.
Azure Portal
NOTE
In addition to the certificate in a PFX format that was used in the previous section, you will need a copy of the certificate in CER format.
You can convert your existing certificate using OpenSSL (easily installed by running
choco install openssl.light):
openssl pkcs12 -in certificate.pfx -out certificate.cer -nokeys -clcertsYou will need to edit the resulting file to remove all of the text above the
-----BEGIN CERTIFICATE-----line.
-
Navigate to the
Resource Groupthe contains your C4B Azure Environment. -
Select the
Application gateway.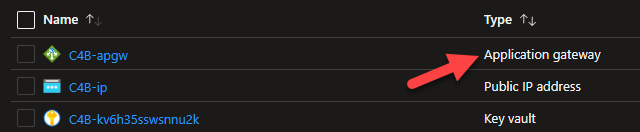
-
Under
Settingson the left of the blade, selectBackend settings. -
Select
CCMService.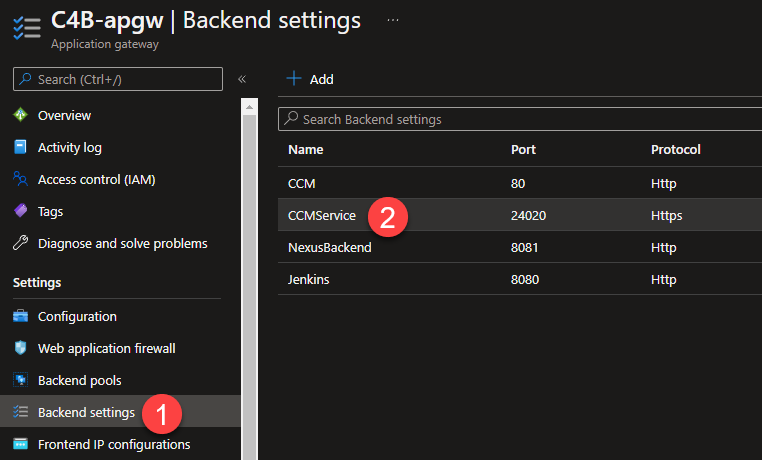
-
On the
Add Backend settingsblade, click+ Add certificate.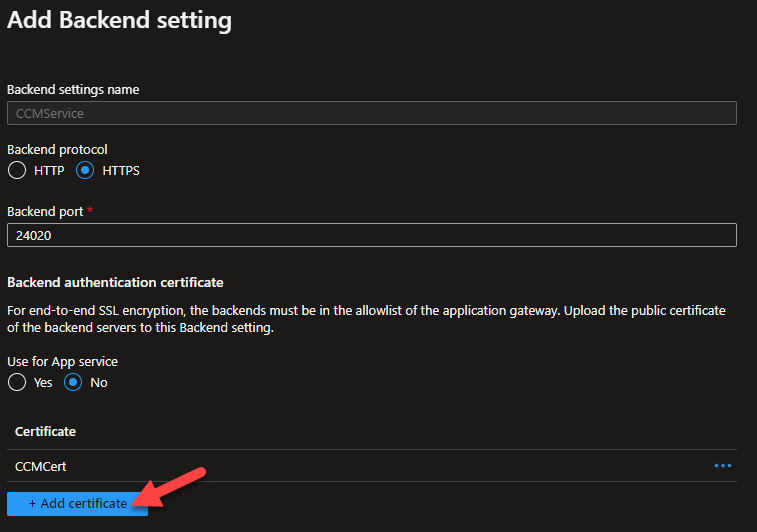
-
Ensure
Create newis selected and browse to the.cerversion of your certificate. -
Provide a descriptive
Cert namethat is different to the existing certificate. The initial certificate is calledCCMCert. -
Click
+ Add certificate.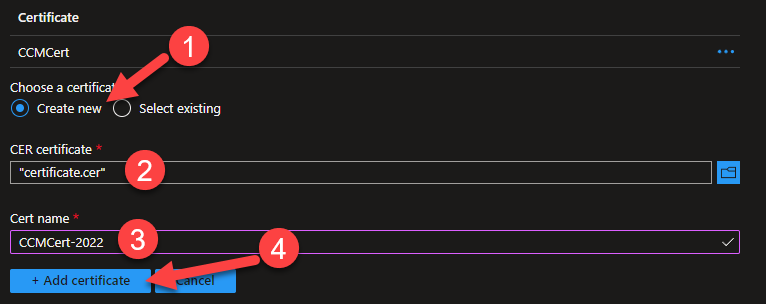
-
Click the
...(three dots) to the right of the previous certificate and chooseDelete. -
Click
Save.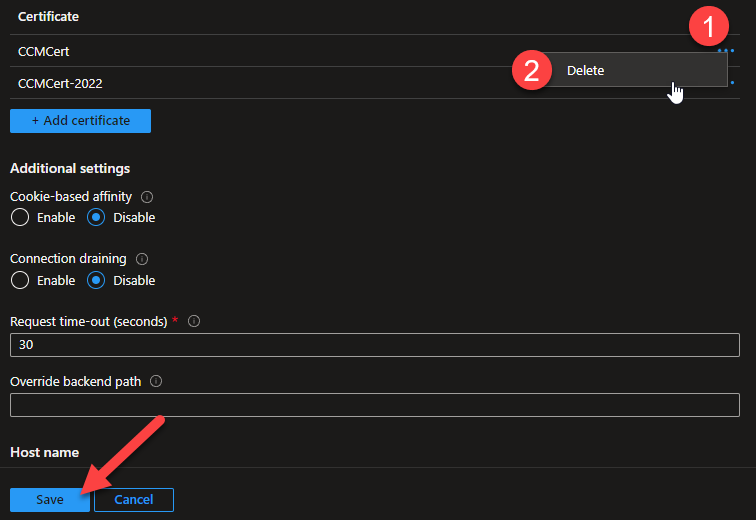
-
Under
Settingson the left of the blade, selectListeners. -
Select
CCM.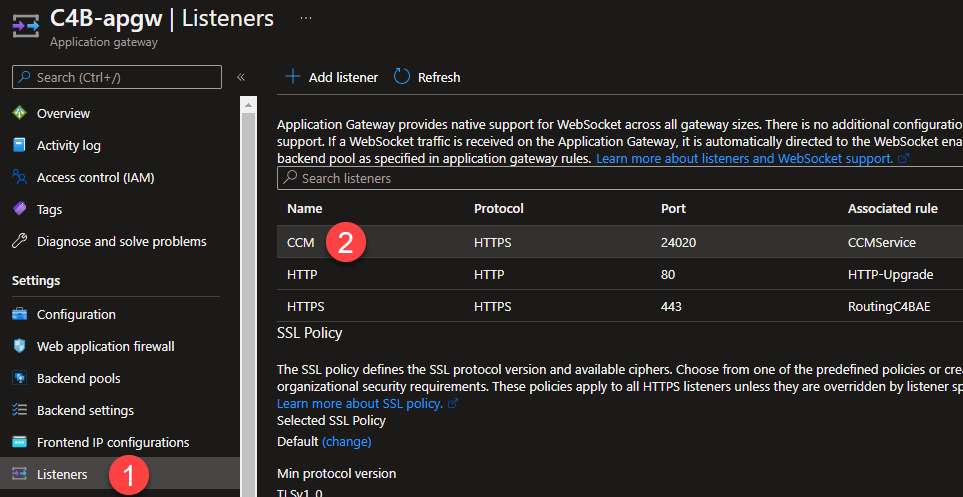
-
Ensure
SslCertificateis the selected certificate. -
Check
Renew or edit selected certificate. -
Browse to select the
.pfxversion of your certificate. -
Enter the
Passwordrequired to import the certificate. -
Click
Save.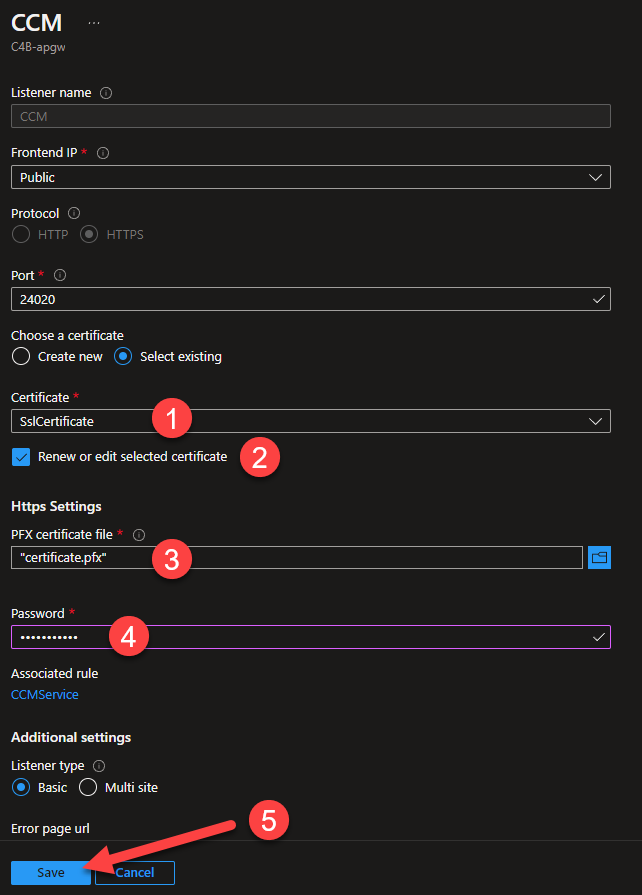
-
It can take some time for the Application Gateway to update. When it has finished you will be able check that the new certificate is being served by visiting on the C4B Azure Environment services.
PowerShell
Please note that until the Set-AzApplicationGateway command is run, the Application Gateway will not be updated. The update can take up to 30 minutes, but the command should return immediately.
if (-not $ResourceGroupName) {$ResourceGroupName = Read-Host 'Enter the ResourceGroupName'}
$ApplicationGateway = Get-AzApplicationGateway -ResourceGroupName $ResourceGroupName

$null = [System.Reflection.Assembly]::LoadWithPartialName("System.Windows.Forms")
if (-not $FileBrowser.FileName) {
    $FileBrowser = New-Object System.Windows.Forms.OpenFileDialog -Property @{
        Title  = 'Select Chocolatey for Business Azure Environment Certificate'
        Filter = 'Certificate (*.pfx)|*.pfx'
    }
    $null = $FileBrowser.ShowDialog()
}

$CertificateDetails = @{
    Name               = "SslCertificate"
    CertificateFile    = $FileBrowser.FileName
    Password           = Read-Host "Enter the certificate import password" -AsSecureString
}

# Set the listener SSL certificate
$ApplicationGateway = Set-AzApplicationGatewaySslCertificate -ApplicationGateway $ApplicationGateway @CertificateDetails

# Convert the certificate to a CER format
$Cert = [System.Security.Cryptography.X509Certificates.X509Certificate2]::new(
    $CertificateDetails.CertificateFile,
    $CertificateDetails.Password,
    32  # EphemeralKeySet
)
[IO.File]::WriteAllBytes(($TemporaryCerPath = New-TemporaryFile), $Cert.Export("Cert"))

# Set the authentication certificate for the CCM service
$ApplicationGateway = Set-AzApplicationGatewayAuthenticationCertificate -ApplicationGateway $ApplicationGateway -Name "CCMCert" -CertificateFile $TemporaryCerPath

# "Save" the new settings to the Application Gateway
$null = Set-AzApplicationGateway -ApplicationGateway $ApplicationGateway

# Clean up the temporary CER
Remove-Item $TemporaryCerPath
FAQ
I’ve uploaded a new certificate, why hasn’t it been applied?
Some components of the C4B Azure Environment need to select between multiple versions of a certificate when determining if an update is required.
The determining factor is the NotBefore date on the certificate. The latest date is considered to belong to the newest certificate.
You can check the NotBefore property of a pfx file using PowerShell:
$CertificatePath = Read-Host 'Enter the path to the certificate file'
Get-PfxCertificate -FilePath $CertificatePath | Select-Object NotBefore